Rear drive maintenance at tire changes

fredz43

Well-Known Member
Founding Member
2011 Site Supporter
2012 Site Supporter
2013 Site Supporter
2014 Site Supporter
Joined
Sep 1, 2010
Messages
3,297
Location
IL, the land of straight, flat, boring roads
tomatocity said:
If any of you are going to Lowe's, Home Depot, or any other place to find the Threaded Stock Coupler... take a 19mm socket or wrench with you or walk over to the tools section and barrow a 19mm socket or wrench... use the tool to fit the Coupler. It does not matter the size of the ID.

I just measured the Coupler in my tire kit and it is OD=19mm ID=.5"
I went back to Lowes and got a refund for the 1/2 inch threaded rod coupler. This time I had my 19 mm socket with me. I can tell you that the Lowes in Sopringfield, IL does not have a threaded rod coupler that will fit a 19 mm socket. Same as my local Ace Hardware, the 1/2 inch is too small and the 5/8 inch is too big. I do have a homemade tool that I made from a hex head bolt with two nuts that works, though.
 

jajpko

New Member
Founding Member
2011 Site Supporter
2012 Site Supporter
Joined
Nov 26, 2010
Messages
2,776
Location
North Texas
fredz43 said:
I went back to Lowes and got a refund for the 1/2 inch threaded rod coupler. This time I had my 19 mm socket with me. I can tell you that the Lowes in Sopringfield, IL does not have a threaded rod coupler that will fit a 19 mm socket. Same as my local Ace Hardware, the 1/2 inch is too small and the 5/8 inch is too big. I do have a homemade tool that I made from a hex head bolt with two nuts that works, though.
That's really strange. I just bought another one from HD and it was a perfect fit. Did yours come in an orange plastic bag? I would think the size would have to be the same for the people using these in construction. Their 3/4" wrenches would need to fit to do the job..
 

fredz43

Well-Known Member
Founding Member
2011 Site Supporter
2012 Site Supporter
2013 Site Supporter
2014 Site Supporter
Joined
Sep 1, 2010
Messages
3,297
Location
IL, the land of straight, flat, boring roads
japako said:
That's really strange. I just bought another one from HD and it was a perfect fit. Did yours come in an orange plastic bag? I would think the size would have to be the same for the people using these in construction. Their 3/4" wrenches would need to fit to do the job..
Hi Jim,

It was in a plastic bag, but I don't think it was orange, rather it was clear. The package has a Hillman brand name and a H#881653 part number.
 

jajpko

New Member
Founding Member
2011 Site Supporter
2012 Site Supporter
Joined
Nov 26, 2010
Messages
2,776
Location
North Texas
fredz43 said:
Hi Jim,

It was in a plastic bag, but I don't think it was orange, rather it was clear. The package has a Hillman brand name and a H#881653 part number.
Here is a link to HD and the part. It says 25 to a box, but they sell 1ea.
http://tinyurl.com/bn7agjr
 

fredz43

Well-Known Member
Founding Member
2011 Site Supporter
2012 Site Supporter
2013 Site Supporter
2014 Site Supporter
Joined
Sep 1, 2010
Messages
3,297
Location
IL, the land of straight, flat, boring roads
japako said:
Here is a link to HD and the part. It says 25 to a box, but they sell 1ea.
http://tinyurl.com/bn7agjr
Thanks, Jim. I printed that and will take it to my nearest Home Depot the next time I head that way. 36 miles is my closest one. If it ever cools off around here, I wil take a ride.
 

erenet

New Member
2012 Site Supporter
Joined
Oct 10, 2011
Messages
509
Location
Ontario Canada
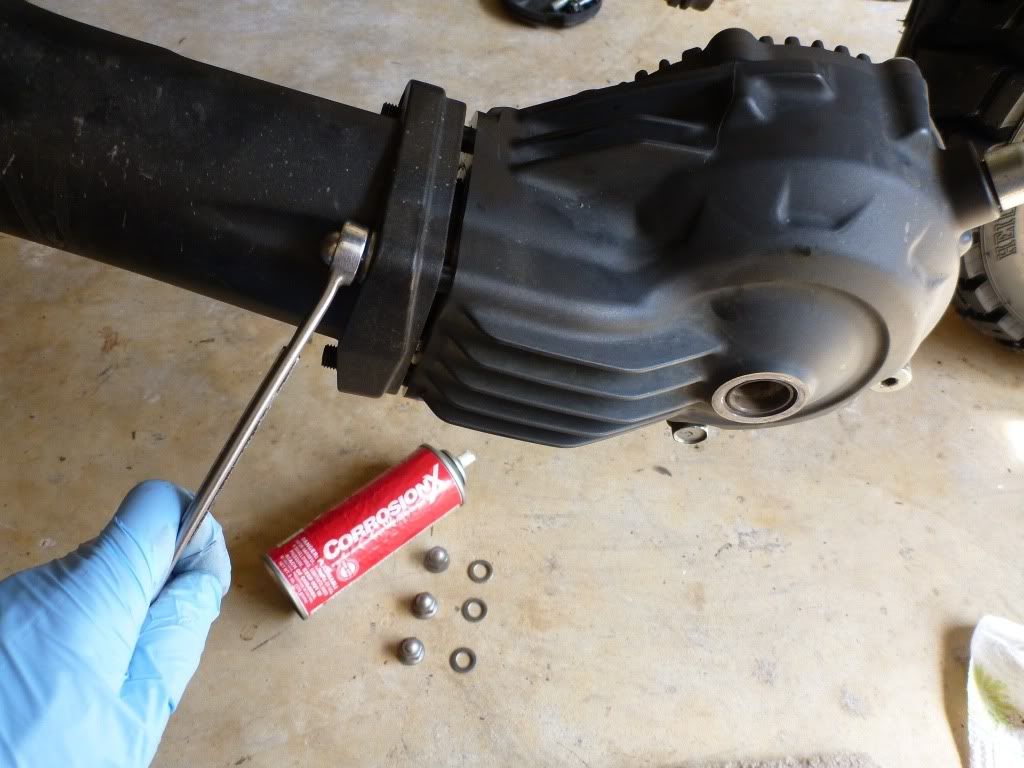
The 4 nuts and washers are visible in the following photos I snapped when doing this.


Nice work, what is the torque for the 4 nuts, thanks.
 

tomatocity

Active Member
2011 Site Supporter
2012 Site Supporter
2013 Site Supporter
2014 Site Supporter
Joined
Mar 1, 2011
Messages
5,251
Location
Sacramento, CA USA
The word "snapped" concerns me when referring to nuts and bolts ;)

Yes, what is the torque of the four nuts?
 

Old Git Ray

UK based. Retired and travelling the world
Founding Member
2011 Site Supporter
2012 Site Supporter
Joined
Jan 6, 2011
Messages
117
Location
Back in th UK
Just to throw a spanner in the works, so to speak, Yamaha have the same lack of grease problem on the steering head bearings.

I found this on the S10 and on my previous 2008 XT660Z (which seized over the winter with rust). Fortunately, it is a relatively easy problem to sort out and is a good excuse to check the play on the bearings at the same time.

IIRC (it is a while since I did it), when on the main stand, it is just a case of removing the top clamp, gently tie the bars and top clamp back on cloth over the tank and then carefully remove the two castellated nuts bearing in mind that the forks (and wheel etc) will drop down suddenly if not controlled.
One can then heavily grease the bearings and reassemble to the the specs. (initially 38 ft/lb to settle, then loosen and re-torque to 18 ft/lb).
 

markjenn

Active Member
Founding Member
Joined
Oct 22, 2010
Messages
2,427
Location
Bellingham, WA
Old Git Ray said:
IIRC (it is a while since I did it), when on the main stand, it is just a case of removing the top clamp, gently tie the bars and top clamp back on cloth over the tank and then carefully remove the two castellated nuts bearing in mind that the forks (and wheel etc) will drop down suddenly if not controlled.
One can then heavily grease the bearings and reassemble to the the specs. (initially 38 ft/lb to settle, then loosen and re-torque to 18 ft/lb).
I believe this only does half the job - there is a lower bearing and you can't get to it without removing the bottom triple.

- Mark
 

Dallara

Creaks When Walks
Founding Member
Joined
Nov 26, 2010
Messages
2,195
Location
South Texas
markjenn said:
I believe this only does half the job - there is a lower bearing and you can't get to it without removing the bottom triple.

- Mark

I just did it - both top and bottom tapered bearings - while I have the forks off getting the Penske valving installed and the forks rebuilt. It was easy as it could be. Not the least bit difficult nor frustrating.

Oddly enough, however, despite my bike having 21,000 miles on it *AND* the internal fork bushings showing a fair amount of wear, both the upper and lower steering head bearings were not only nice and tight before I pulled them out, but were quite nicely greased. Not anywhere near *dry* of grease as some have reported. Grease appeared to be of nice quality, too, as well as there being an adequate amount. Everything was in perfect shape and could have easily gone another 20-K.

Since I was already there I went ahead and cleaned the bearings, then re-greased them with a nice mix of Krytox, Honda Moly 60 paste, and Amsoil Synthetic waterproof grease.

One note... Read the service manual instructions *CAREFULLY* (I believe the steering head assembly section starts on page 3-19), and note that the second notched steering head nut goes on *ONLY* a firm finger-tight. Try to tighten it more than that and you will distort and damage the rubber o-ring gasket that goes between the two notched stem nuts. Also note the orientation of your torque wrench to the special tool wrench for the notched stem nut as specified in the service manual.

All in it's a simple task, and can easily be done in about 20 to 30 minutes once the forks are pulled out.

Just FYI...

Dallara


~
 

Old Git Ray

UK based. Retired and travelling the world
Founding Member
2011 Site Supporter
2012 Site Supporter
Joined
Jan 6, 2011
Messages
117
Location
Back in th UK
markjenn said:
I believe this only does half the job - there is a lower bearing and you can't get to it without removing the bottom triple.

- Mark
As stated above, the lower bearing is also exposed when the top yoke and castle nuts are removed.
 

markjenn

Active Member
Founding Member
Joined
Oct 22, 2010
Messages
2,427
Location
Bellingham, WA
Old Git Ray said:
As stated above, the lower bearing is also exposed when the top yoke and castle nuts are removed.
You're aware that there is a bearing at the very bottom of the steering head, 6" below the castle nuts, right? AFAIK, there is no way you can get to this bearing without lowering the triple tree out of the steering head and to do this you have to remove the wheel and forks.

One of us is missing something.

- Mark
 

Dallara

Creaks When Walks
Founding Member
Joined
Nov 26, 2010
Messages
2,195
Location
South Texas
markjenn said:
You're aware that there is a bearing at the very bottom of the steering head, 6" below the castle nuts, right? AFAIK, there is no way you can get to this bearing without lowering the triple tree out of the steering head and to do this you have to remove the wheel and forks.

One of us is missing something.

- Mark

Geez, Mark...

Seems you want to constantly imply that *YOU* are the only person to have ever actually worked on a motorcycle, picked up a wrench, or read a service manual. It's fairly obvious - at least to me and I imagine everyone else here - that Old Git Ray not only is very, very aware that there is a lower steering head bearing, but in addition to that is quite probably a more experienced wrench that you are.

BTW, I have serviced many, many a lower steering head bearing in my over 40 years of motorcycle mechanics *WITHOUT* removing the front wheel or the forks. You simply remove the upper triple clamp and lower the wheel, forks, and lower triple clamp all down together... I done this with overhead hoists, hanging the front end of the bike off a lift, and even just jacking the front end high enough with the rear wheel blocked up.

So perhaps you are right... *YOU* are missing something.

In this case I will admit I did remove the front wheel, forks, etc. to service my lower (and upper) steering head bearing, but that's primarily because I was pulling the forks for a complete rebuild/revalve, replacing my front brake pad sets, and mounting a new front tire.

Dallara


~
 

roy

Member
Founding Member
Joined
Oct 19, 2010
Messages
751
Location
Mississippi
And GOD has spoken, all further input on this subject is a complete waste of time. ::002::


BTW Mark he knows his typing and constant ranting very well so leave him be it's his world ::009::
 

tomatocity

Active Member
2011 Site Supporter
2012 Site Supporter
2013 Site Supporter
2014 Site Supporter
Joined
Mar 1, 2011
Messages
5,251
Location
Sacramento, CA USA
Whats with the NASCAR attitude... Full Moon, nope. I think some of us should consider using PM's to show our dislike. With that... enough said.
 

snakebitten

Well-Known Member
2012 Site Supporter
2013 Site Supporter
2014 Site Supporter
Joined
Aug 6, 2011
Messages
5,681
Location
Coastal Texas
Nascar Attitude?

I'll admit that there seems to be more than the usual amount of caustic "attitude" around here, but labeling such as "Nascar attitude" is likely to catch some nice folks in that net.

You ever met Joe Gibbs? :)
 

AndyCBR

Member
2012 Site Supporter
2013 Site Supporter
2014 Site Supporter
Joined
Nov 26, 2011
Messages
129
Location
Baton Rouge, LA
japako said:
The shaft splines on the pumpkin side are not oil bath. The manual states a moly paste, like Honda 60.
I had mine apart to check it out recently.. If you do take it apart, you will need new seals

Hey guys I was considering taking this assembly apart and had the oil seal in hand but could never figure out whether that drive coupler in the rear is in the oil bath or not.

From another thread below it appears that coupler is bathed in oil. Perhaps the factory manuals recommendation of paste is for assembly purposes only.

That makes sense as that spline set is sliding back and forth inside the drive coupler as the swingarm goes up and down and any paste would be quickly wiped away from the back and forth motion.

So from what I can tell cleaning the shaft itself and lubricating the forward splines is all you can do with regards to the pumpkin.

http://www.yamahasupertenere.com/index.php?topic=4652.30
 

markjenn

Active Member
Founding Member
Joined
Oct 22, 2010
Messages
2,427
Location
Bellingham, WA
AndyCBR said:
From another thread below it appears that coupler is bathed in oil. Perhaps the factory manuals recommendation of paste is for assembly purposes only.
Neither end of the drive shaft splines is "bathed in oil". The service manual recommends moly paste on the final drive (aft) end and lithium grease on the universal joint (forward) end.

- Mark
 

AndyCBR

Member
2012 Site Supporter
2013 Site Supporter
2014 Site Supporter
Joined
Nov 26, 2011
Messages
129
Location
Baton Rouge, LA
markjenn said:
Neither end of the drive shaft splines is "bathed in oil". The service manual recommends moly paste on the final drive (aft) end and lithium grease on the universal joint (forward) end.

- Mark

I think if you look at the thread I mentioned the rear coupler appears to be as there are 2 holes in the coupler. OP in that thread actually had a leak repaired under warranty due to that seal leaking.

There are 2 oil seals, one large one that the female coupler rides on and another one forward of the shaft.

Check out that thread.

Tough to explain OP's oil leak there if no oil is present?
 
Top