At last time for service. After a very disappointing 2000km last year she got new oil&filter, lubed the shifter and brake. General overlook and good to go.
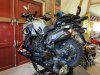
Is that a collection in the background? Like that burnt orange Honda.At last time for service. After a very disappointing 2000km last year she got new oil&filter, lubed the shifter and brake. General overlook and good to go.
View attachment 99925
Haha yeah beautiful candy gold CB500. It’s part of the vehicle’s I am selling.Is that a collection in the background? Like that burnt orange Honda.
Sent from my SM-N960U using Tapatalk
This is Awesome!!!I guess this counts. I finished building my toolbox organizers and toolbox dolly that holds my tools for working on the Super Tenere. The dolly began life as a furniture dolly from Harbor Freight.


Three 2x4's, one 1x4, and a glued up shelf from Lowe's formed most of the dolly. I wanted it to be small enough to tuck into a corner, and all the tool carts I found were too big. The socket organizer was made from a piece of half inch plywood, and a bunch of 1/2", 3/8" and 1/4" dowel rods. The ratchet organizer is another piece of half inch plywood; I traced the outlines of my ratchets, extensions, etc onto the plywood, then cut them out with a coping saw.

I put an LED light under the tabletop, so it would illuminate the lower tool box and make it easier to see the contents. There's enough clearance to be able to open the lid on the lower box without having to remove it from the dolly.


I made holders for my breaker bars from 1/8" aluminum angle and pieces cut out from a discarded cutting board.

In its new home in the garage.
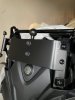
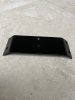
Can’t wait to see the mounted pics!I just got my Kineo wheels!


I'm very interested to follow this along. Let us know how well it works? If the wireless connection is strong? If there are glitches in the mapping system working and overall system as it runs?I made the support for the carplay screen... with a 2mm sheet, it's enough to give it firmness. I thought it was a good position for everything to be harmonious….There is enough space to place it further back..or you can advance the screen a bit, and lower it in front of the bar. I'll see later where connect the power supply
View attachment 99963View attachment 99964View attachment 99966View attachment 99967View attachment 99968


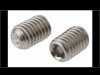
if you don't want it to move, you can make a small hole between the nuts, thread it to size, and place one or two studs. It will make a small mark on the bar…but the mount will no longer seek to rotate on the barBuilt a double U-bolt mount for my Zumo XT, for those really bumpy rides where you want the mount to stay put. Hardware store U-bolts, scrap aluminum, and some ABS plastic. Had to buy the threaded RAM ball from Amazon.


I need one of those.I guess this counts. I finished building my toolbox organizers and toolbox dolly that holds my tools for working on the Super Tenere. The dolly began life as a furniture dolly from Harbor Freight.
Three 2x4's, one 1x4, and a glued up shelf from Lowe's formed most of the dolly. I wanted it to be small enough to tuck into a corner, and all the tool carts I found were too big. The socket organizer was made from a piece of half inch plywood, and a bunch of 1/2", 3/8" and 1/4" dowel rods. The ratchet organizer is another piece of half inch plywood; I traced the outlines of my ratchets, extensions, etc onto the plywood, then cut them out with a coping saw.
I put an LED light under the tabletop, so it would illuminate the lower tool box and make it easier to see the contents. There's enough clearance to be able to open the lid on the lower box without having to remove it from the dolly.
I made holders for my breaker bars from 1/8" aluminum angle and pieces cut out from a discarded cutting board.
In its new home in the garage.
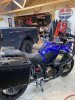
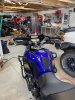
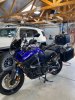

If you were closer it would be sold... despite the wife's reaction!Haha yeah beautiful candy gold CB500. It’s part of the vehicle’s I am selling.
