kenbro
New Member
So, I got inspired by this thread over here.
http://www.yamahasupertenere.com/index.php?topic=1783.0
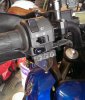
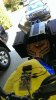
and decided to move my instrument cluster buttons to the handlebars, but the Traction control resetting to TC 1 every time you shut the bike off really annoyed me.
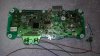
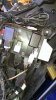
I've been playing around with micro controllers and decided to try and hook one up so it resets the traction control to what ever setting it was on when I turn the bike off.
It took me about a month of playing around with it in my free time but I finally got it working. I am trying to figure out how to post links and photos so I can do a write up here.
Ken
http://www.yamahasupertenere.com/index.php?topic=1783.0
and decided to move my instrument cluster buttons to the handlebars, but the Traction control resetting to TC 1 every time you shut the bike off really annoyed me.
I've been playing around with micro controllers and decided to try and hook one up so it resets the traction control to what ever setting it was on when I turn the bike off.
It took me about a month of playing around with it in my free time but I finally got it working. I am trying to figure out how to post links and photos so I can do a write up here.
Ken
Attachments
-
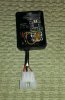 73.1 KB Views: 197

") That would be great !
That would be great !