gbergma1
MATER MOMENTUS MORI
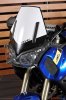
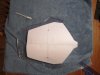
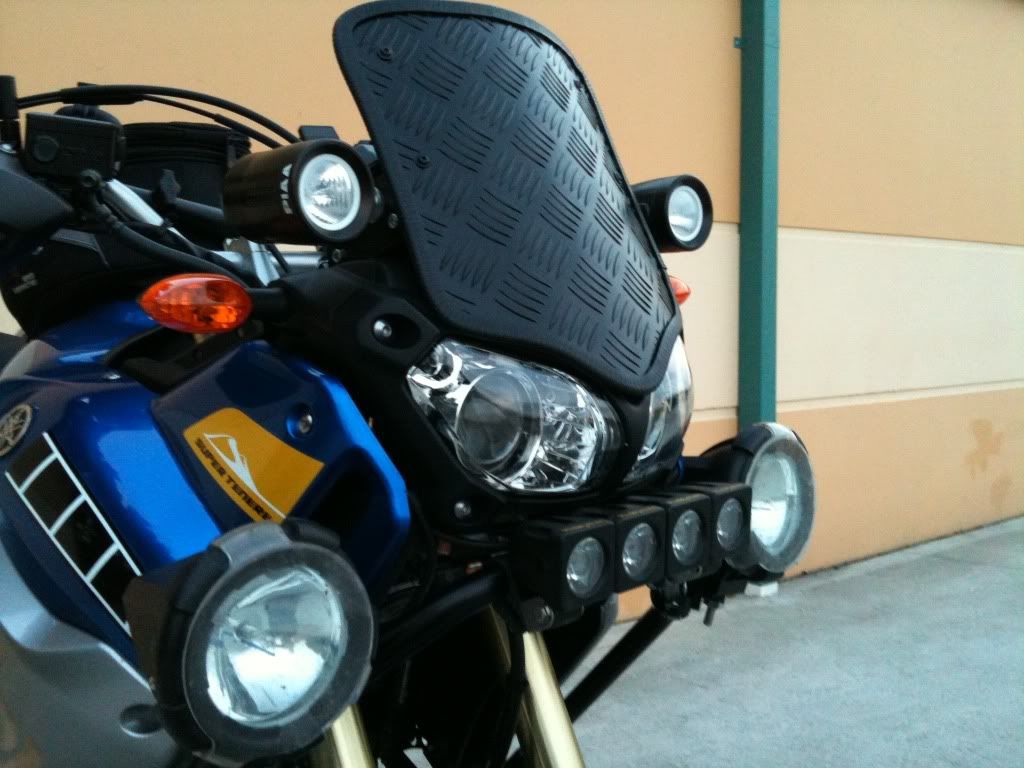
I really liked the look of the "shorty" screen and don't mind the mind since I have been riding a supermoto for the past 4 years. Below is one we have all seen. I couldn't really find one, but if I did pretty sure it would have cost around 120 to 200 bucks. This darn bike has me hemorrhaging cash and my wife cut me off so I needed a plan B. I was able to rescue a piece of ABS destined for the dumpster, thickness was comparable to a windscreen, so I thought it would be easy to mock something up. I used the photo borrowed from the web and measured the distance between the bolt holes. Now I had a baseline to scale the photo and get a really rough idea of dimensions. I drew a 2D profile and split it into 4 quadrants so I could print it on my home printer (it only has 8.5"x11" sheets). I cut out the 4 shapes (2 would do since it is symmetrical) and taped them together for a rough pattern.
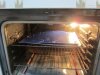
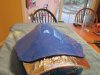
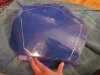
Now the interesting part. The stock windscreen has a lot more curvature than appears at first glance. I suppose one could really geek out and grid out the entire screen and use a coordinate measuring device to create the 3D data to obtain accurate surfacing data. It isn't hard, but the equipment is expensive and my work would frown on my making personal bits instead of slaving away for them. Plan B, I wrapped the stock windscreen in foil to protect it (not sure if this was necessary, but it looks pro right?). I preheated the wife's oven to 350 degrees F and found a cookie sheet; in went the ABS sheet for 8.5 minutes. I purposely left part of the ABS sheet hanging off the cookie sheet to see when gravity took over and the piece was malleable. I Put on some leather gloves and rested the hot sheet on the stock screen. I worked it into the screen evenly and purposely left a lot hanging off the edges because when plastic cools it contracts, yielding some weird curvature. The ABS was set and stiff in about 5 minutes at room temperature. If you wanted to go really pro I suppose you could use 2 windscreens and sandwich the ABS sheet or create a vacuum fixture. I think that is way too much work for minimum improvement and who in the world has two screens?....
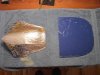
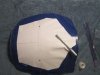
Before lifting the ABS sheet off the stock bit, mark a couple dots on either side to help you keep your paper template centered. The template I created ended up looking too tall for my liking so I lopped off about 1.25" inches parallel to the top line (the attached PDF is the taller version). The ABS sheet in the photo looks terrible because it has a protective film can peel away when you are done working on it. The template won't lay perfectly because of the curvature, but close enough to get the idea across. I used scotch tape to hold it down, but I didn't put tape in the corners. Using a marker I just traced the outside line, pulled up the stencil, I knocked out the rest of the cut lines with a flexible straight edge.
I have a lousy set of tools at the house, but I decided I just wanted to jump right in rather than waiting to run to the store, or go to a proper shop. I used a jig saw with a the only blade I could find, ended up being a blade for dry wall. I hand cut on the lines. I was about 8 cups of coffee deep so things are exactly true, symmetrical, straight, etc. The only think I could find to sand and create fillets in my garage was this 4 inch diameter grinding disc for a drill. Well, giddy up. I went around the outside, trying to keep a steady hand, more waviness created, but now it isn't a knife around the edges. I eyeballed the location and marked the four stock holes, drilled a pilot hole, and came back with a larger bit. Nothing cracked. I had to cut some stock nubs off the factory plastic bolt plate things, but other than that, fit just like stock.
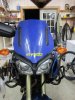
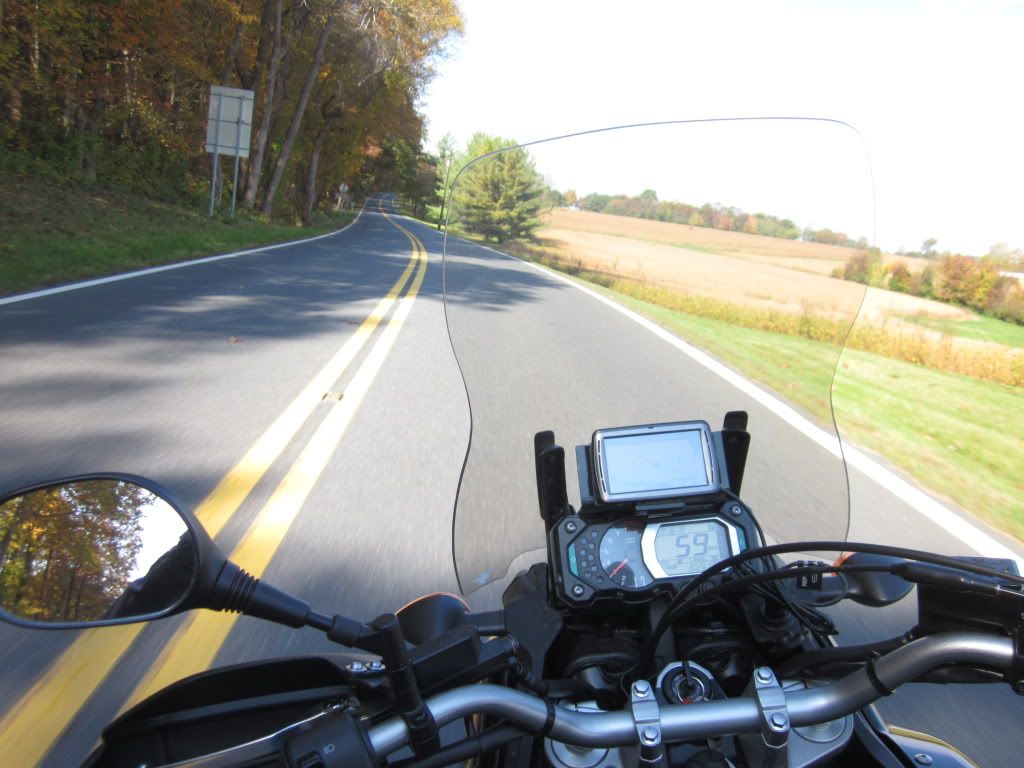
Took me about an hour and half for everything, cost me nothing. The process is good, next time I will take the steps necessary to get straight cuts and correct fillets. Anxious to get it on the road to experiment with different heights. Ultimately it would be super cool to get over to wind tunnel and start tall and run through different heights to see how the laminar flow is coming off that top lip, but at 350 bucks an hour for the WWW.a2wt.com, that won't be happening any time soon.
Go ahead and pillage any information you want. I am putting up the PDF I created, print to scale, but the holes on the template are only to assist you to tape the 4 sections together, don't drill with them.
Now the interesting part. The stock windscreen has a lot more curvature than appears at first glance. I suppose one could really geek out and grid out the entire screen and use a coordinate measuring device to create the 3D data to obtain accurate surfacing data. It isn't hard, but the equipment is expensive and my work would frown on my making personal bits instead of slaving away for them. Plan B, I wrapped the stock windscreen in foil to protect it (not sure if this was necessary, but it looks pro right?). I preheated the wife's oven to 350 degrees F and found a cookie sheet; in went the ABS sheet for 8.5 minutes. I purposely left part of the ABS sheet hanging off the cookie sheet to see when gravity took over and the piece was malleable. I Put on some leather gloves and rested the hot sheet on the stock screen. I worked it into the screen evenly and purposely left a lot hanging off the edges because when plastic cools it contracts, yielding some weird curvature. The ABS was set and stiff in about 5 minutes at room temperature. If you wanted to go really pro I suppose you could use 2 windscreens and sandwich the ABS sheet or create a vacuum fixture. I think that is way too much work for minimum improvement and who in the world has two screens?....
Before lifting the ABS sheet off the stock bit, mark a couple dots on either side to help you keep your paper template centered. The template I created ended up looking too tall for my liking so I lopped off about 1.25" inches parallel to the top line (the attached PDF is the taller version). The ABS sheet in the photo looks terrible because it has a protective film can peel away when you are done working on it. The template won't lay perfectly because of the curvature, but close enough to get the idea across. I used scotch tape to hold it down, but I didn't put tape in the corners. Using a marker I just traced the outside line, pulled up the stencil, I knocked out the rest of the cut lines with a flexible straight edge.
I have a lousy set of tools at the house, but I decided I just wanted to jump right in rather than waiting to run to the store, or go to a proper shop. I used a jig saw with a the only blade I could find, ended up being a blade for dry wall. I hand cut on the lines. I was about 8 cups of coffee deep so things are exactly true, symmetrical, straight, etc. The only think I could find to sand and create fillets in my garage was this 4 inch diameter grinding disc for a drill. Well, giddy up. I went around the outside, trying to keep a steady hand, more waviness created, but now it isn't a knife around the edges. I eyeballed the location and marked the four stock holes, drilled a pilot hole, and came back with a larger bit. Nothing cracked. I had to cut some stock nubs off the factory plastic bolt plate things, but other than that, fit just like stock.
Took me about an hour and half for everything, cost me nothing. The process is good, next time I will take the steps necessary to get straight cuts and correct fillets. Anxious to get it on the road to experiment with different heights. Ultimately it would be super cool to get over to wind tunnel and start tall and run through different heights to see how the laminar flow is coming off that top lip, but at 350 bucks an hour for the WWW.a2wt.com, that won't be happening any time soon.
Go ahead and pillage any information you want. I am putting up the PDF I created, print to scale, but the holes on the template are only to assist you to tape the 4 sections together, don't drill with them.
Attachments
-
 46.1 KB Views: 69
 -
8.5 KB Views: 11
-
 41.9 KB Views: 53
 -
 42.3 KB Views: 38
 -
 47.7 KB Views: 44
 -
 37.4 KB Views: 30
 -
 37.2 KB Views: 32
 -
 42.5 KB Views: 40
 -
 51.3 KB Views: 99


")


