Got mine today. Looks great. Should do wonders to hide all my HID wiring.
dash shelf-cockpit infill SOLD
- Thread starter BWC
- Start date
Madhatter
Well-Known Member
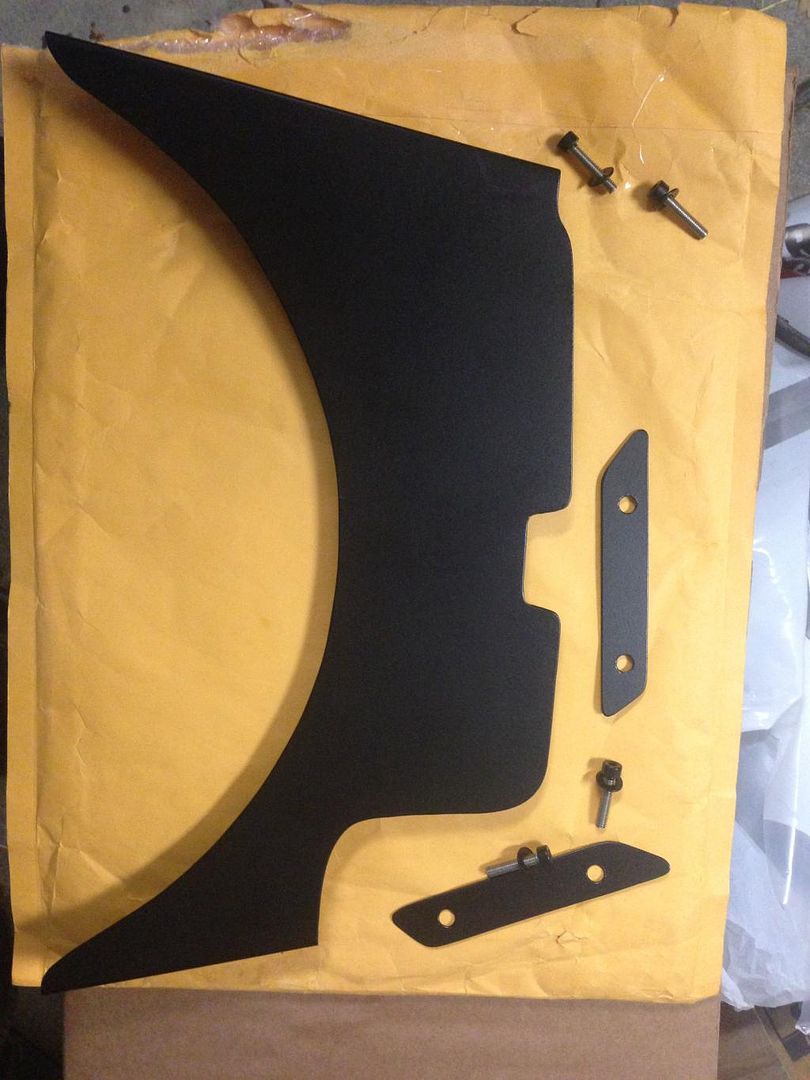
dereki, a very good mate and forum member gave carrot and myself this very dash. it is very well done mounted up easily, gives that area a more finished look... just wished my painting skills matched the quality of this dash...and a place to mount switches and things... its worth the money.
npj1966
Member
$ 35 for this? I am very interested when you decide to make more....
Please let me know.
NPJ
Please let me know.
NPJ
Breezz68
New Member
Got mine Friday looks great quality piece can't wait to install
Fortech
Active Member
I would also like to add my name to the list should you decide to make another run.
ADV Motorrad sells these for $20.00.
https://www.advmotorrad.com/index.php?route=product/product&path=59_81_82&product_id=544
https://www.advmotorrad.com/index.php?route=product/product&path=59_81_82&product_id=544
TheHelios
Taco Enthusiast
How exactly do we fit this in? I tried fenangling with it and I was having a hard time getting it to fit and stopped. I've got heated grips and the cables for them go through this metal loop that was placed within the fork so I may need to bend it down.
Any ideas? Also, what's the total clearance below the plate? IIRC, it was like 1 3/4 inches?
Any ideas? Also, what's the total clearance below the plate? IIRC, it was like 1 3/4 inches?
On a stock bike with no extras added in around the instruments the best way to install is with the bars swung a bit to the right, lower the right side of the plate down in at an angle and insure the plate is fully below, swing the bars to the middle, lift up and install.TheHelios said:How exactly do we fit this in? I tried fenangling with it and I was having a hard time getting it to fit and stopped. I've got heated grips and the cables for them go through this metal loop that was placed within the fork so I may need to bend it down.
Any ideas? Also, what's the total clearance below the plate? IIRC, it was like 1 3/4 inches?
I have a powerlet , 12 volt accessory outlet and a voltmeter installed on mine. I prewired them up on the bench leaving short leads that plug into added wiring from the bike once the plate is installed.
With those items installed it makes it a little more challenging to install and have had it out a few times since without problem. Just be aware that there isn't much space below, in the middle of the dash shelf for accessories as the support for the front headlight etc. runs through there. Hope this helps some.
Bernie does a first rate job with these panels. Got mine the other day and wrapped it with some matte carbon fiber and and trimmed out the edge. Works well with the wind deflectors. The outer mounting plates give you a couple different options with the deflectors. Here's what I ended up doing...Turned out great...


Jeff
Member
Please put me on you list for one also.
Sent from my SM-N910V using Tapatalk
Sent from my SM-N910V using Tapatalk
Ya but OP's item is quite a bit more refined and looks to be more quality. Also streamlined and fit follows the bike better also. But thanks for sharing an alternative in case OP does not make this any longer.StringBean said:ADV Motorrad sells these for $20.00.
https://www.advmotorrad.com/index.php?route=product/product&path=59_81_82&product_id=544
bd
RideRedWA
New Member
I would take one as well. I like the CF vinyl treatment. I put that vinyl on my wind deflectors as well to keep the sun from reflecting back into my eyes. Adding the infill panel would finish it up nicely.
Mayfly-1970
New Member
Just got mine back from Powder Coating. Will install this weekend. ::012::

I'll take one if you make more please. Also where do you guys get your carbon wrap?
Random ride
Member
Build it and they will come. Put me on the list too.
TheHelios
Taco Enthusiast
After A LOT of learning on advanced wiring (used a relay and made myself a test-bed in home), I got this thing done. As Bernie wrote in the little guide he included with the package, wiring is infinitely simpler when done BEFORE adding in the infil. I didn't want to deal with a switch and wanted a more streamlined setup so I used a relay to have the accessories active only when the bike was on. My PIAA headlamps were already pulling from a 10amp line so I just tapped into the PIAA harness for the "on" switch.
I used the PJ1 Satin Black spray paint for the color. I bought a cheap-o dremel-thing from Harbor Freight with some diamond wheels but WOW do they NOT work well with this. I only got about 4 inches of the infil cut after 4 blades and gave up. Thankfully, my father-in-law knows a bodyshop guy who cut the panel for me in less than 10 minutes.
Accessory panel came from good ol' AliExpress for under $18 but with 3 week shipping:
http://www.aliexpress.com/item/Car-Motorcycle-Power-Port-Dual-USB-Adapter-Charger-12V-24V-Cigarette-Lighter-Socket-Digital-Voltmeter-Outlet/32252963409.html
Bought inline fuses from Radio Shack since all misc. parts from their parts cabinets are now 70% off so 3 inline 10 amp adapters and 4 10 amp fuses for all under $5.
http://imgur.com/a/na7ut
Some nicely finished dash shelfs. Carbon fiber, powder coat and accessory outlet-voltmeter install. Nicely done.
Info. on the unit says weather proof so you will have to keep us posted as to how it stands up. Nice that you can also switch positions of the outlets which is probably necessary due to the lesser clearance below the shelf in the center. Just for anyone else installing something like this you can also get a 90 degree terminal connector that lets the wires point sideways instead of down for tight clearance if needed.
Info. on the unit says weather proof so you will have to keep us posted as to how it stands up. Nice that you can also switch positions of the outlets which is probably necessary due to the lesser clearance below the shelf in the center. Just for anyone else installing something like this you can also get a 90 degree terminal connector that lets the wires point sideways instead of down for tight clearance if needed.
Nicely done
Random ride
Member
TheHelios,TheHelios said:After A LOT of learning on advanced wiring (used a relay and made myself a test-bed in home), I got this thing done. As Bernie wrote in the little guide he included with the package, wiring is infinitely simpler when done BEFORE adding in the infil. I didn't want to deal with a switch and wanted a more streamlined setup so I used a relay to have the accessories active only when the bike was on. My PIAA headlamps were already pulling from a 10amp line so I just tapped into the PIAA harness for the "on" switch.
I used the PJ1 Satin Black spray paint for the color. I bought a cheap-o dremel-thing from Harbor Freight with some diamond wheels but WOW do they NOT work well with this. I only got about 4 inches of the infil cut after 4 blades and gave up. Thankfully, my father-in-law knows a bodyshop guy who cut the panel for me in less than 10 minutes.
Accessory panel came from good ol' AliExpress for under $18 but with 3 week shipping:
http://www.aliexpress.com/item/Car-Motorcycle-Power-Port-Dual-USB-Adapter-Charger-12V-24V-Cigarette-Lighter-Socket-Digital-Voltmeter-Outlet/32252963409.html
Bought inline fuses from Radio Shack since all misc. parts from their parts cabinets are now 70% off so 3 inline 10 amp adapters and 4 10 amp fuses for all under $5.
http://imgur.com/a/na7ut
If you don't mind, I just might borrow your idea and do the same on mine. That will fit my needs nicely and still be plenty versatile at the same time. Very nicely done ::008::