I received my new Jesse luggage last week and was surprised to see they redesigned the upper mounting hardware.
From what I gather the change is intended to improve single handed operation.
Here's a video showing operation of the new hardware on the right hand (non-exhaust) side. Everything works as expected.
https://youtu.be/tKQEmj_2hhQ
Here's a video showing the operation of the new hardware on the left hand (exhaust) side.
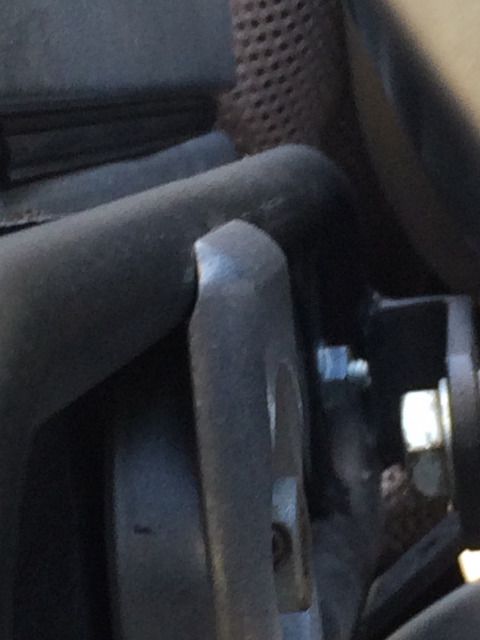
The top leading edge of the delrin block has interference with the top rack loop and takes quite a bit of force to mount and remove.
The delrin block in intended to be held in place with some provided adhesive.
With the force required to remove the box the delrin block pulls away from the box.
In the video I have the retention plate snugged up to the delrin block to keep it from pulling away from the box.
https://youtu.be/EEYcbKDGIBo
The design flaw with the delrin block is so obvious it makes me wonder if anyone even tested the design?
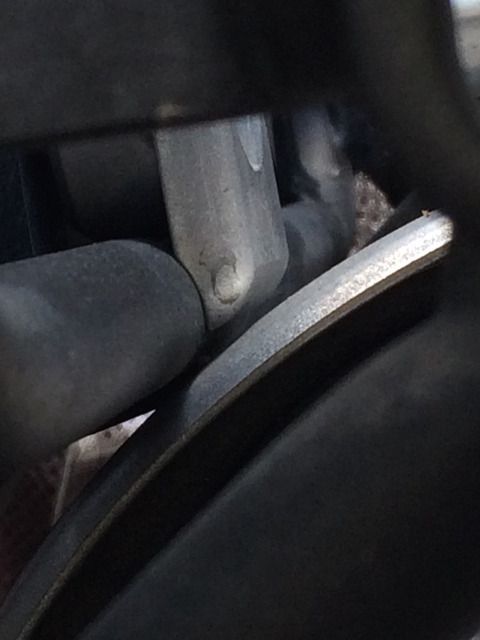
Due to the offset of the upper rack loop (if the lower loop is at 6 o'clock the upper root is at 2 o'clock as viewed from the back of the bike)
the delrin block needs to rise as the box is rotated counter-clockwise off the bike (moving from 2 o'clock back "up" to 12 o'clock)
and the shape of the block does not afford this.
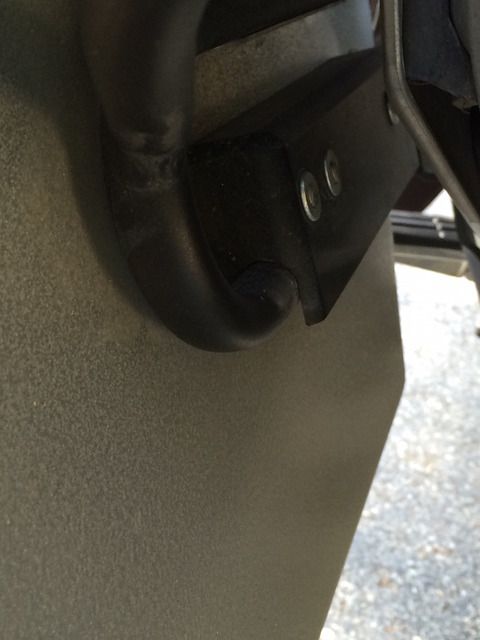
The design flaws don't stop at the delrin block.
The blunt end of the retention block interferes with the exhaust cover meaning the box can only be mounted within a small "all the way forward" range.


Also, mounting the front of the exhaust side rack required flipping pillion foot peg pivot pin so that the cotter-pin is on top.


I'm looking to provide some constructive feedback to Jesse and it would help if I had detailed "profile" pictures of the "older" mounting hardware.
Thanks in advance.
From what I gather the change is intended to improve single handed operation.
Here's a video showing operation of the new hardware on the right hand (non-exhaust) side. Everything works as expected.
https://youtu.be/tKQEmj_2hhQ
Here's a video showing the operation of the new hardware on the left hand (exhaust) side.
The top leading edge of the delrin block has interference with the top rack loop and takes quite a bit of force to mount and remove.
The delrin block in intended to be held in place with some provided adhesive.
With the force required to remove the box the delrin block pulls away from the box.
In the video I have the retention plate snugged up to the delrin block to keep it from pulling away from the box.
https://youtu.be/EEYcbKDGIBo
The design flaw with the delrin block is so obvious it makes me wonder if anyone even tested the design?
Due to the offset of the upper rack loop (if the lower loop is at 6 o'clock the upper root is at 2 o'clock as viewed from the back of the bike)
the delrin block needs to rise as the box is rotated counter-clockwise off the bike (moving from 2 o'clock back "up" to 12 o'clock)
and the shape of the block does not afford this.
The design flaws don't stop at the delrin block.
The blunt end of the retention block interferes with the exhaust cover meaning the box can only be mounted within a small "all the way forward" range.
Also, mounting the front of the exhaust side rack required flipping pillion foot peg pivot pin so that the cotter-pin is on top.
I'm looking to provide some constructive feedback to Jesse and it would help if I had detailed "profile" pictures of the "older" mounting hardware.
Thanks in advance.
")