GSequoia
Active Member
I've been wanting a camera system for both the bikes and cars for some time but am a bit of a stickler on not wanting some big ugly thing hanging off a windscreen. After a bit of researching and querying of some friends I settled in on the Innovv K2 Camera system. I purchased it from Amazon for $340. Below please see my installation details as well as some sample videos.
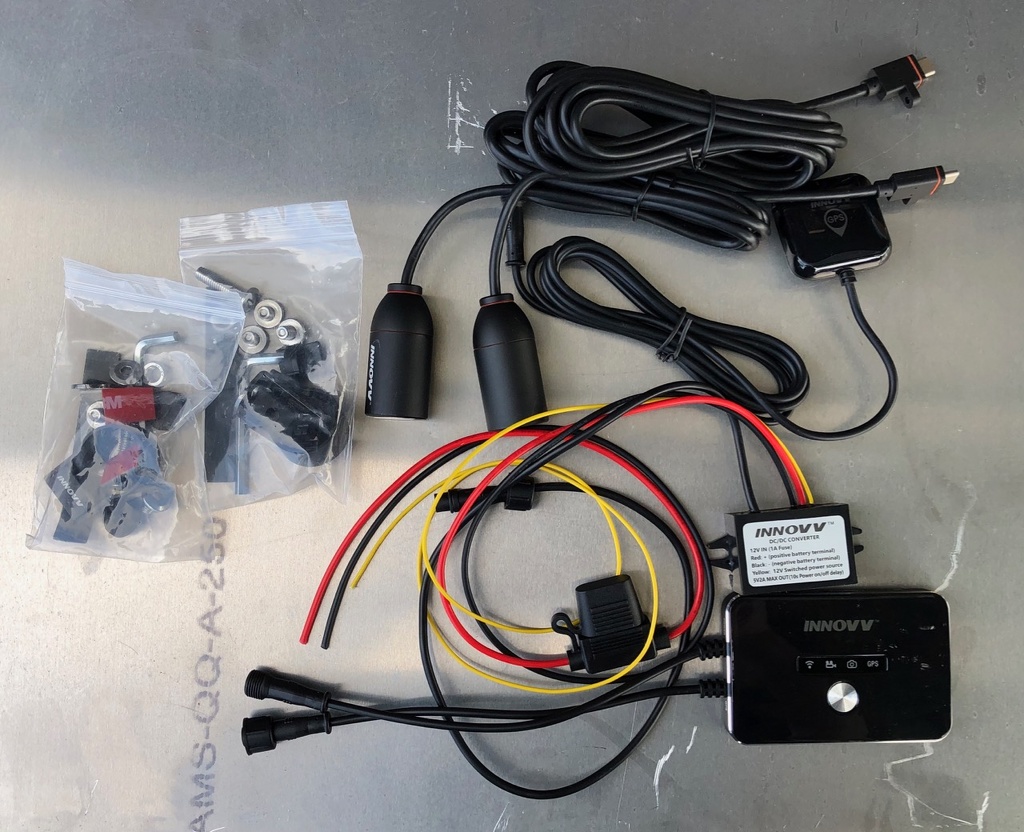
This is the camera system once you get it out of the box.
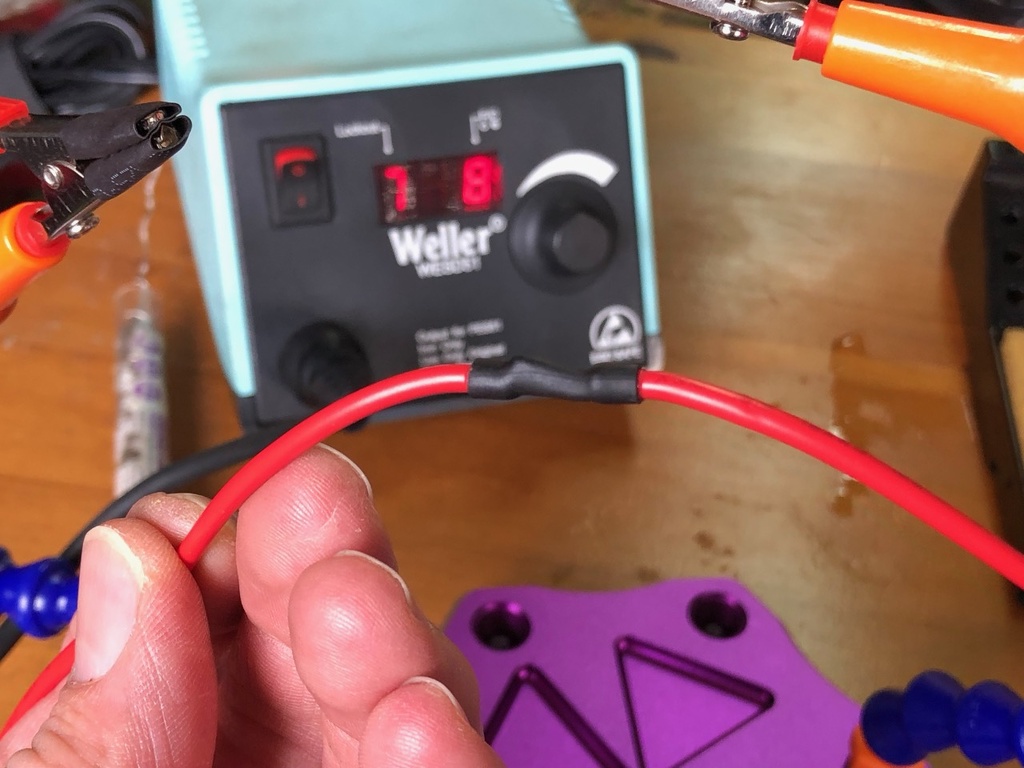
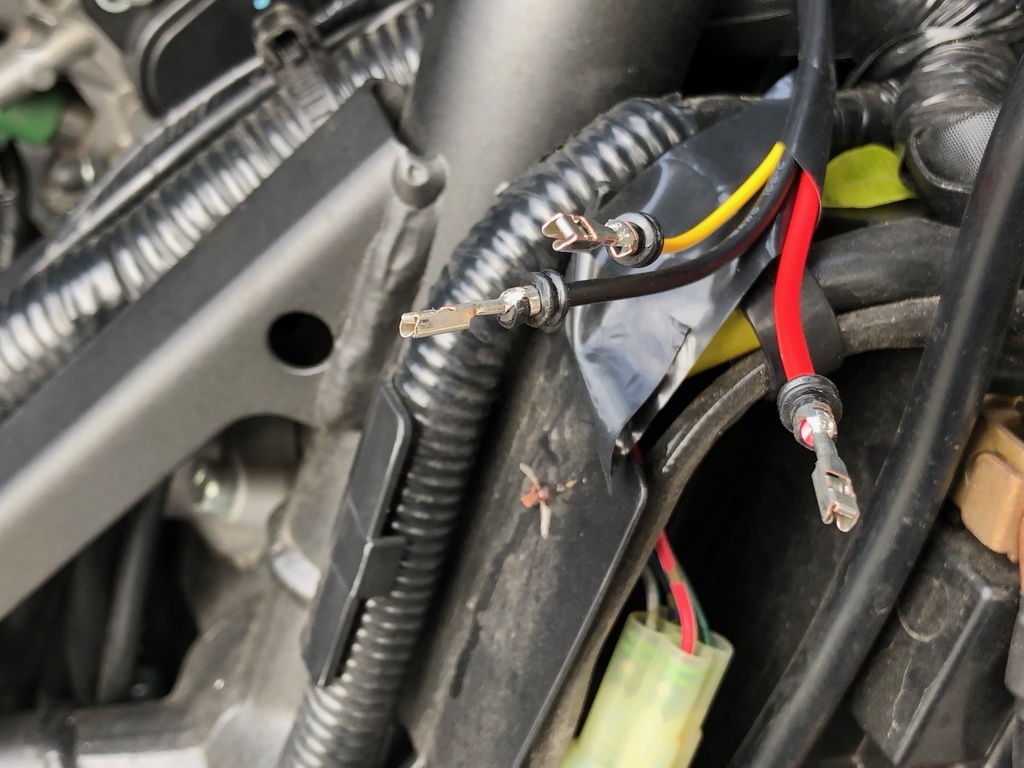
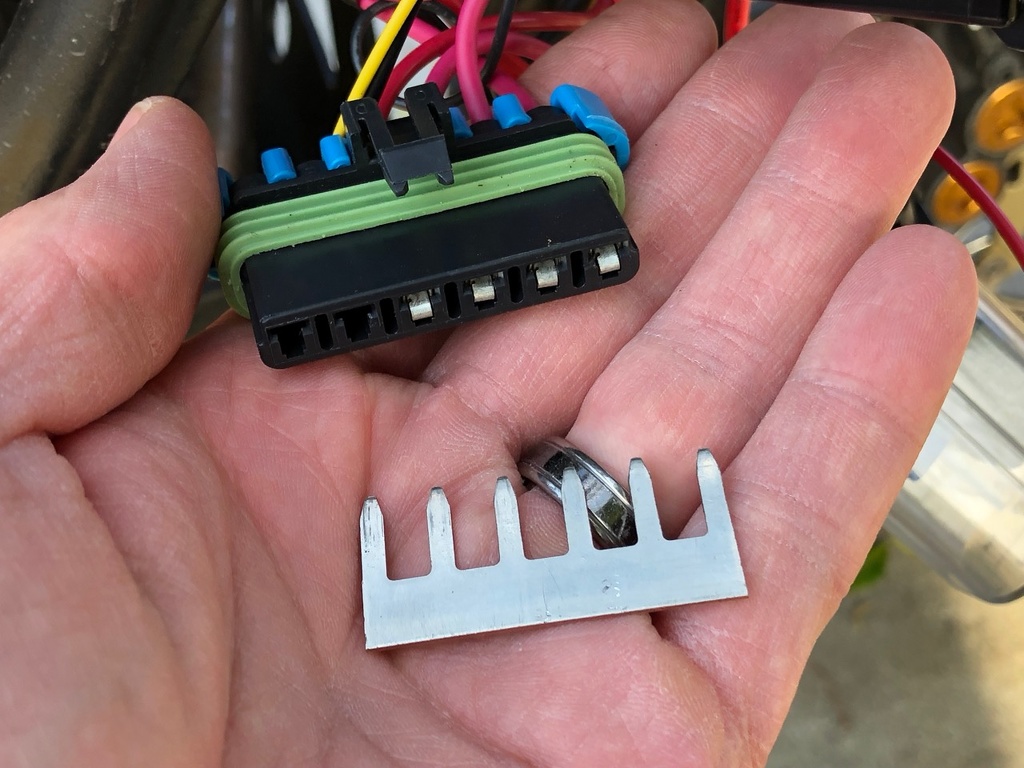
Since I've already laid out auxiliary fuse boxes tucked under the right hand cowling the first task was to eliminate the unnecessary inline 2A fuse.
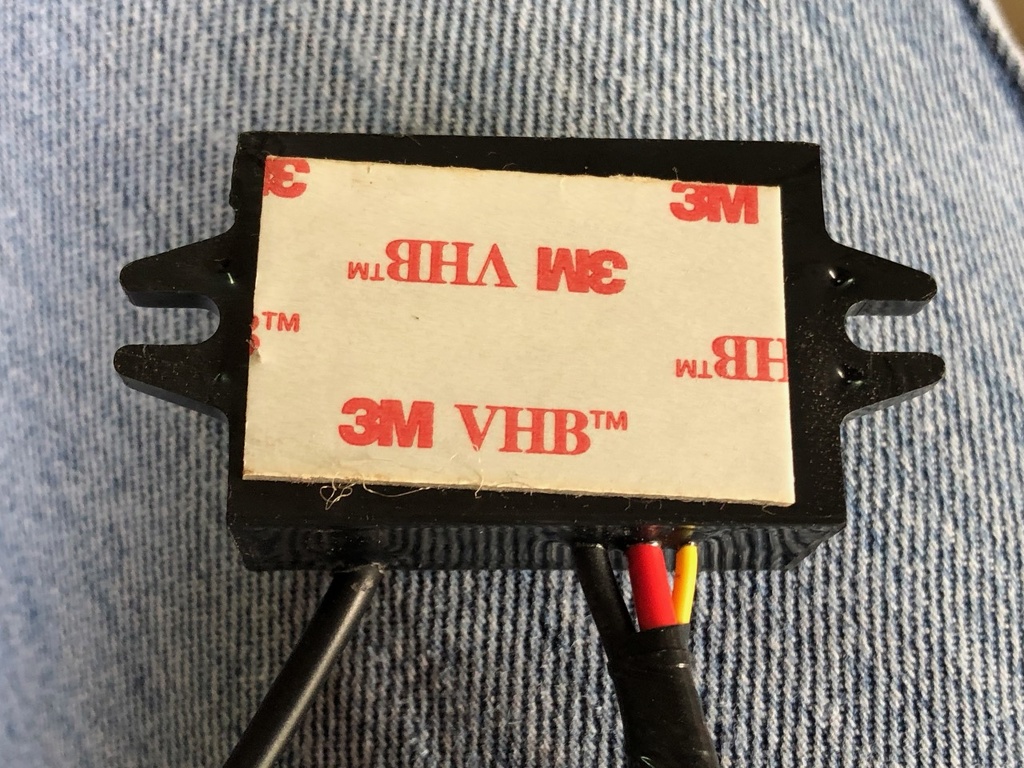
The next step of the planning was to figure out where I wanted to mount the DC to DC converter. I decided to use 3M VHB double-sided tape to mount it to the charcoal cannister under the fuel tank. If you're not familiar with this tape it is fantastic and holds very well. To use it simply clean the surface off with alcohol to ensure it is oil free, let it air dry, then peel and stick.
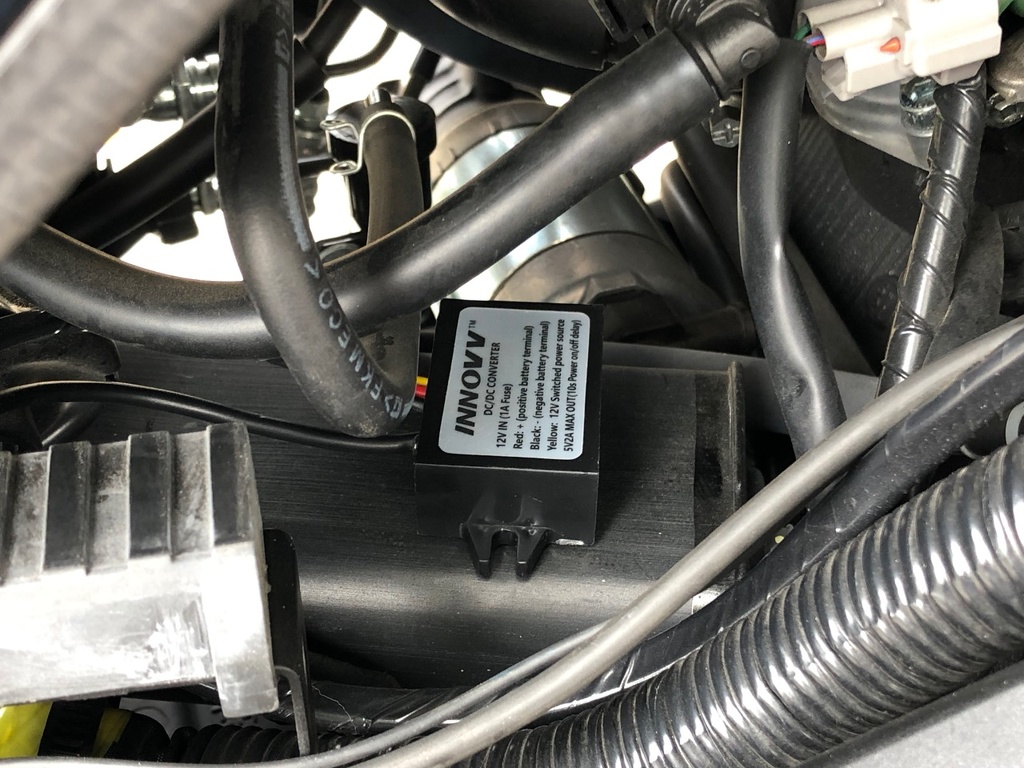
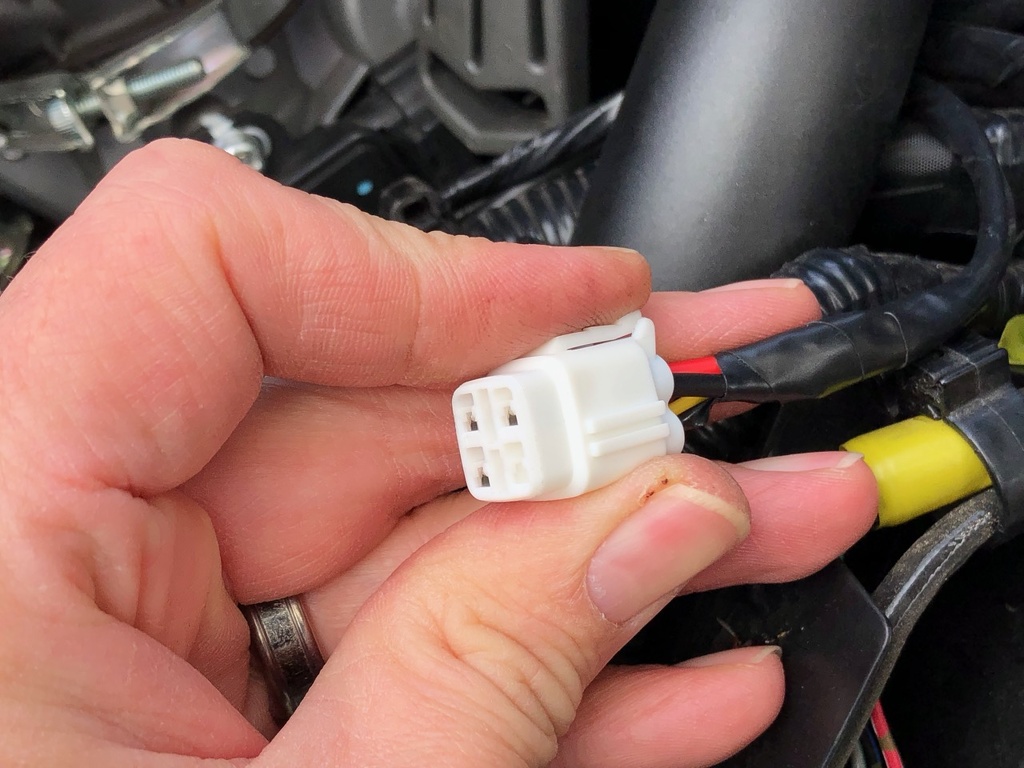
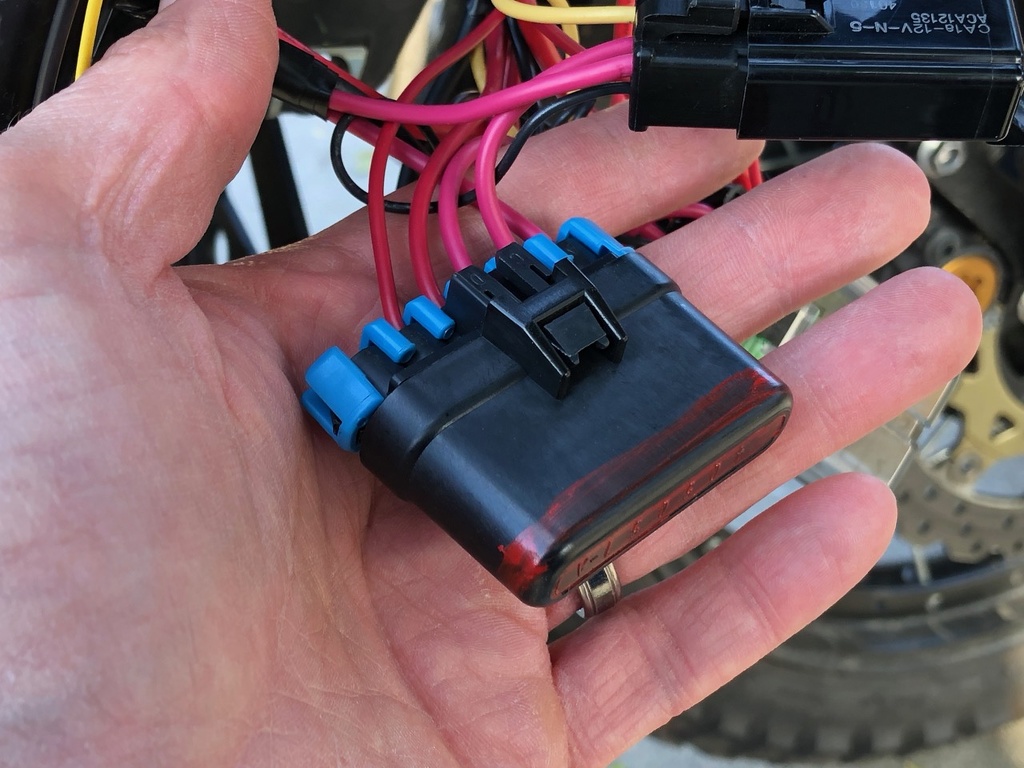
Next I routed the cabling (which I first wrapped in dry vinyl tape) toward the right side cowling. Once the cabling was in place I crimped on an OEM-style four pin connector (I would have used a three pin but ran out).
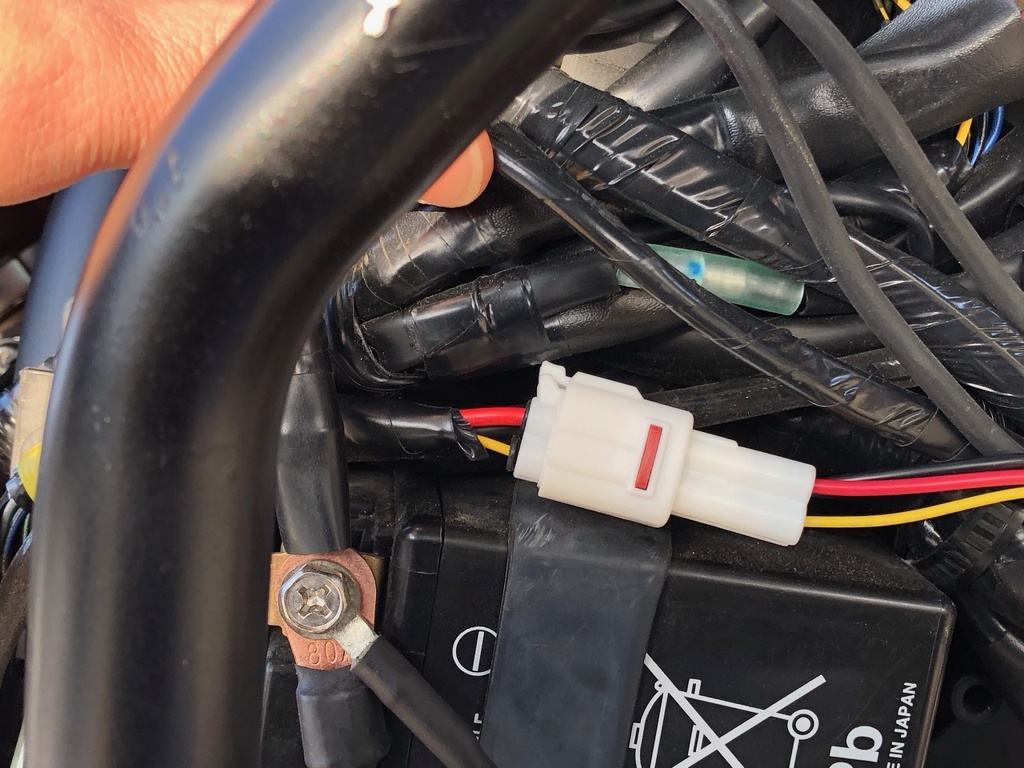
With some luck after installing the converter, routing the cable, securing it to the wiring looms, and putting the connector on it fit in a perfect spot directly above the battery.
Now was the time to work on the mating side of the wiring harness and get the system wired up to the bike. As I mentioend previously I have already done a fair amount of wiring on this bike so this was the easiest part of the job. The device requires just three wires, a constant +12VDC power course (2A draw), an ignition switched +12VDC power source (negligable draw), and ground. When building up my lighting and power solutions earlier I left an extra fuse slot in place for just this project. I will tap into my existing switched ignition power circuit since there is hardly any draw and use my ground buss bar to deliver ground.
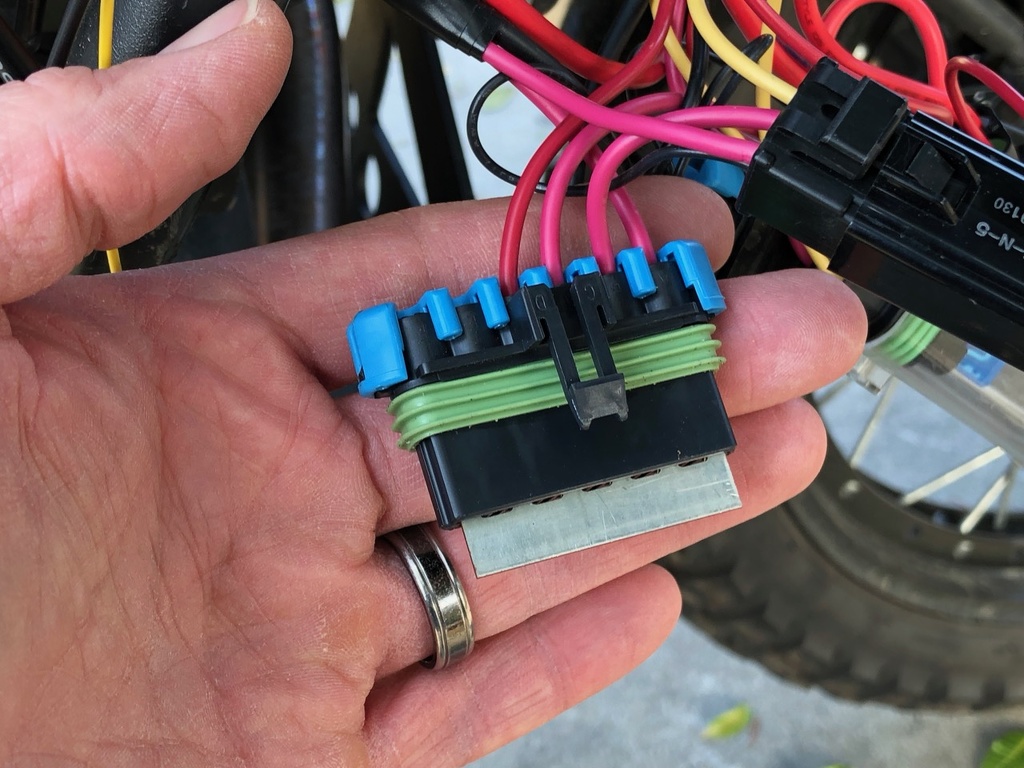
My source power for the input side of the fuse. A buss bar that neatly splits the incoming constant +12VDC 20A circuit from the OEM auxiliary lights connector.
This connector will hold three micro fuses, this buss bar, or a combination thereof.
Closed up with the water-resistant cover on.
Backside of the fuse box.

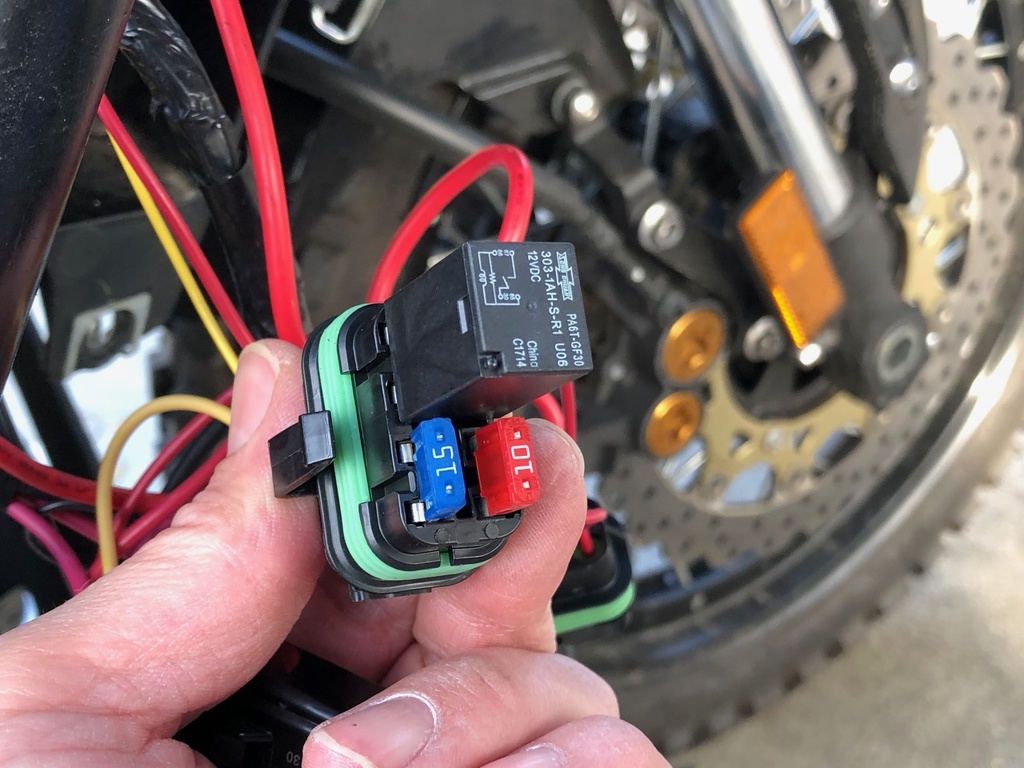
Front of fuse box. These little boxes will hold four micro fuses with a lower-profile clear plastic cover or one micro relay and two fuses (as pictured) with the taller cover. Note this is actually the fuse box for my auxiliar lights and power USB power outlet.
Cover in place. The cover has a slot for a sheetmetal mount you can screw or strap to the frame if you so choose.

Next and not pictured I added the yellow +12VDC switched power cable in to my existing switched ignition power feed (which takes its input power from the constanct +12VDC buss bar whcih goes to a relay then the same OEM auxliliar lights connection's ignition power circuit acts as the trigger wire of the relay so creates a circuit that has 20 amps of headroom for me to use.
I have another buss bar for ground distribution, as well, so added the black cable to this.
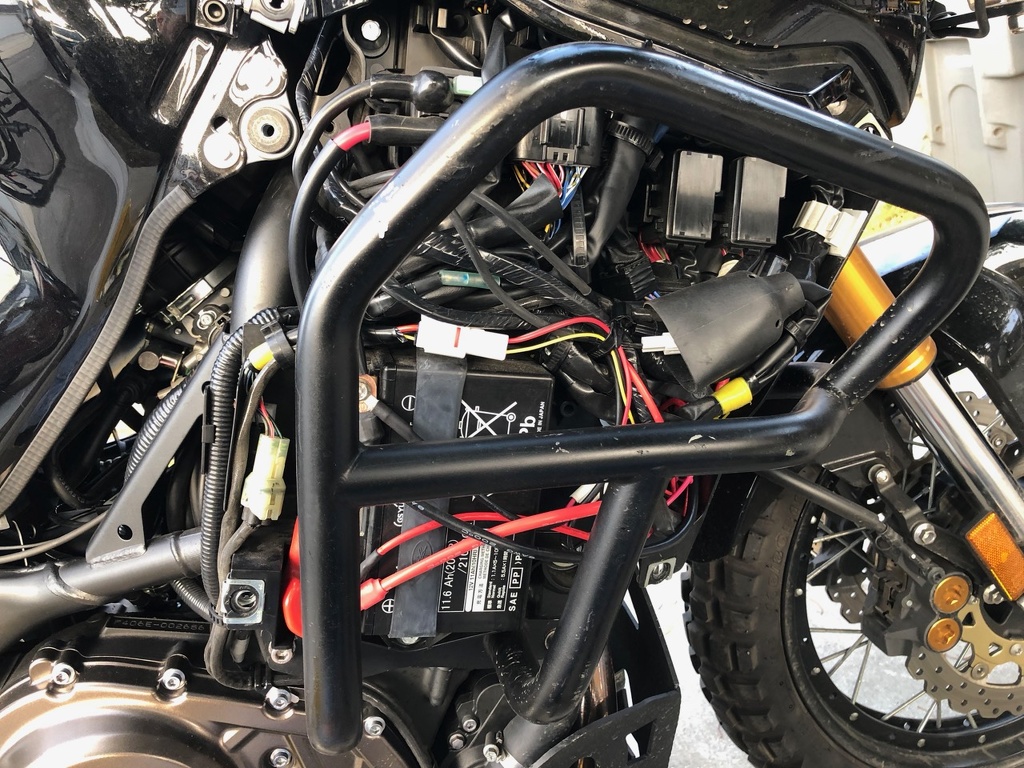
Once complete working on wiring the two fuse boxes, two buss bars, and my Micro Start jump start lead all tuck into the void previously filled by the factory OEM tool kit, I use its rubber band strap to hold the wiring in place as I button the side cowling back up.
Now on to mounting the camears themselves. The cameras come with some rather weak L mounts. Originally I was going to fabricate my own mounts but I got lazy (not to mention impatient to complete the project). So far they seem to have held up rather well so I may just keep them in place.
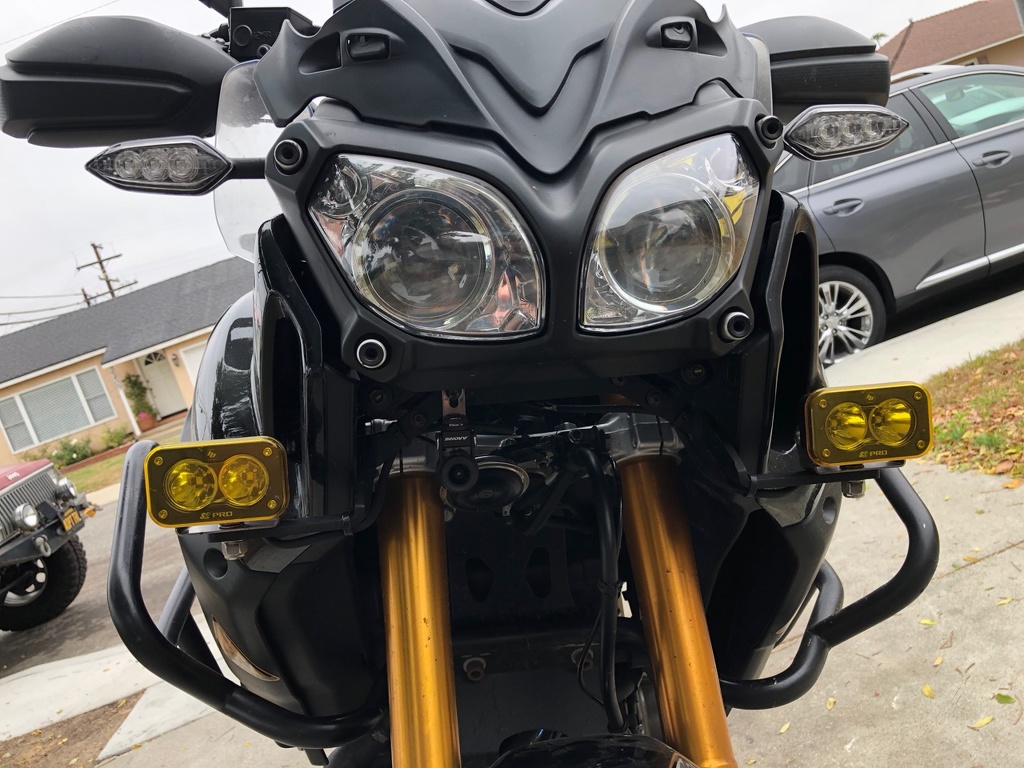
I tucked the front camera in uner the headlmap using one of the bolts from my auxiliar light bracket.
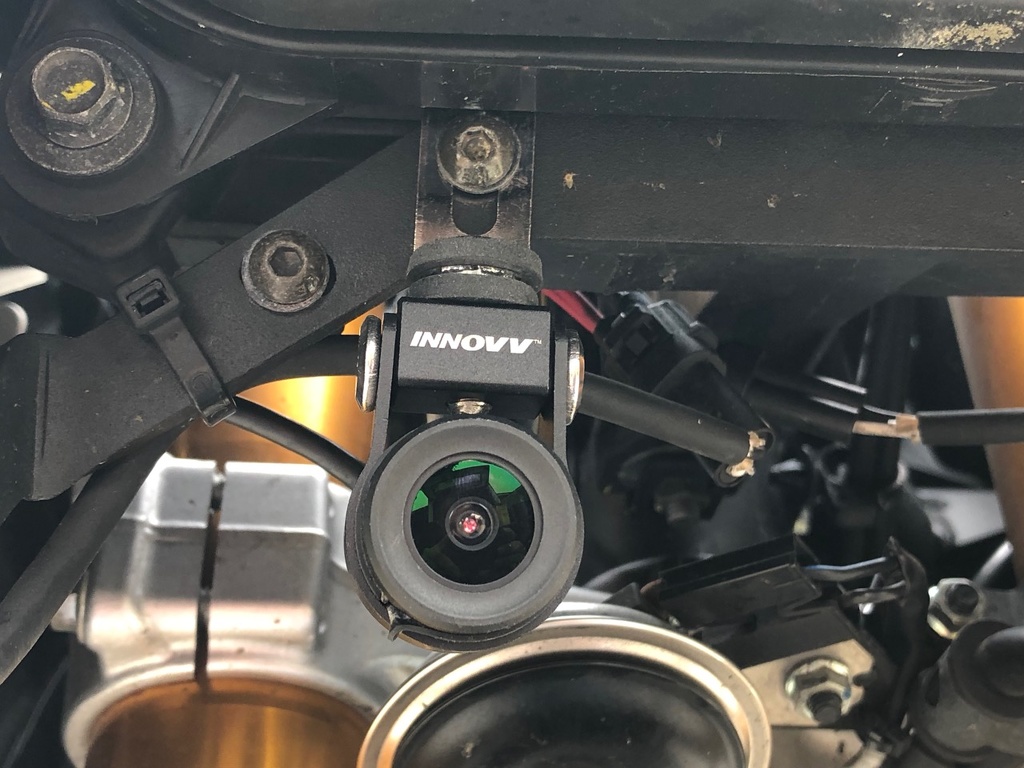
Being discrete was one of my goals for this project.
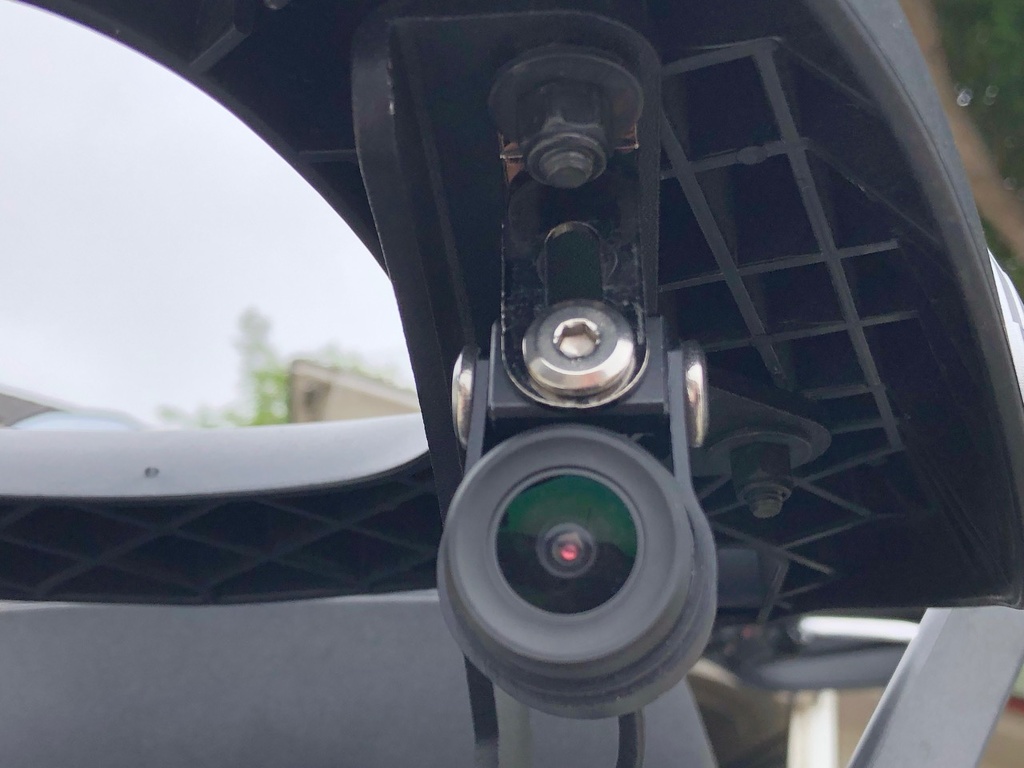
The rear camera is hung off of the Givi top box rack.
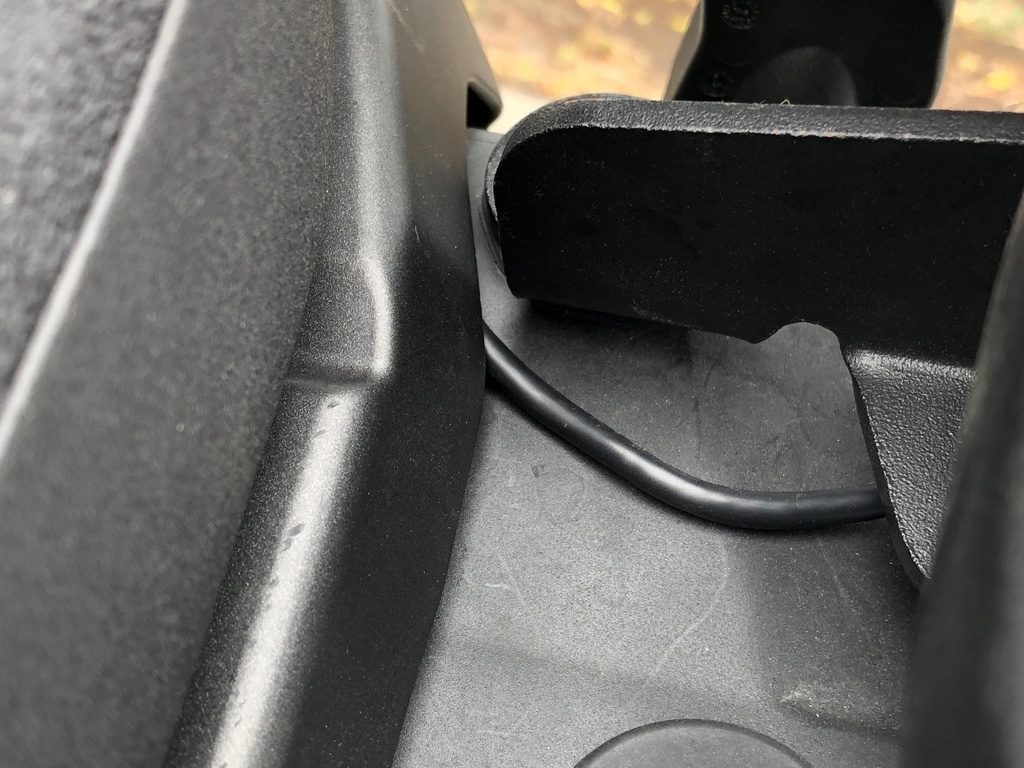
I didn't want to drill any holes in the body so you can just see a tiny bit of the cable from the rear camera until it snakes under the rear seat base / luggage rack.
Since I wanted this installation to be discreet I chose to mount the GPS antenna to the dashboard / headlamp superstructure in between the forks. Again I used 3M VHB tape to adhere it.

This is the control unit for the camera. It is natively water resistent so I don't expect any issues.

One more note on the installation - Those various terminals, fuse boxes, and buss bars all came from Cycle Terminal, a good resource for OEM-style connectors. It's typically tough to find these types of connectors and pins in a small quantities.
Now for the fun part. Using it. The camera records to a MicroSD card. I currently have a 64 GB card in frok my GoPro stash but plan to put a 256 GB card in (their published maximum capacity). Offloading video content can be done in one of two ways. You can use their rather slow built in WiFi transfer using their app or remove the MicroSD card and attach it directly to your computer (my preferred method).
There are a lot of different configuration options to go through, I chose to not display speed (wink wink), show my license plate number on the outputted video, and the date of time. They also have a rather poorly named function called "loop time" with various durations. This isn't actually a loop, rather this is breaking up the videos into smaller sections, I chose three minutes to make for easier offloading through the app. One downside here is it appears the divided up videos overlap by about half a second so when stitching videos together you'll need to pay attention.
If you just want to pull straight video you're pretty much done. If you want to get a bit more exotic I recommend the app Dashcam Viewer available for either PC or Mac for $25. This will give you telemetry based on the GPS location. Note if you have previously tried this and found the GPS data not to work with these cameras I contacted the developer and he wrote an update to read these files. Here is a sample video of what you see in the software:
Now for some samples of day verses night videos. Both of these vides are the same section of road:
Day:
Night:
As you will notice the video quality isn't as high as cameras such as GoPros but that's okay, this isn't meant to replace those. The audio quality is particularly terrible but I don't really care about that. You'll see how it cuts in and out, I believe that it is peaking out. It would be nice if the system had some gain controls to help modulate that but I'm not terrible concerned. I really bought this in case of wreck or other interesting things seen while riding.
Sequoia
This is the camera system once you get it out of the box.
Since I've already laid out auxiliary fuse boxes tucked under the right hand cowling the first task was to eliminate the unnecessary inline 2A fuse.
The next step of the planning was to figure out where I wanted to mount the DC to DC converter. I decided to use 3M VHB double-sided tape to mount it to the charcoal cannister under the fuel tank. If you're not familiar with this tape it is fantastic and holds very well. To use it simply clean the surface off with alcohol to ensure it is oil free, let it air dry, then peel and stick.
Next I routed the cabling (which I first wrapped in dry vinyl tape) toward the right side cowling. Once the cabling was in place I crimped on an OEM-style four pin connector (I would have used a three pin but ran out).
With some luck after installing the converter, routing the cable, securing it to the wiring looms, and putting the connector on it fit in a perfect spot directly above the battery.
Now was the time to work on the mating side of the wiring harness and get the system wired up to the bike. As I mentioend previously I have already done a fair amount of wiring on this bike so this was the easiest part of the job. The device requires just three wires, a constant +12VDC power course (2A draw), an ignition switched +12VDC power source (negligable draw), and ground. When building up my lighting and power solutions earlier I left an extra fuse slot in place for just this project. I will tap into my existing switched ignition power circuit since there is hardly any draw and use my ground buss bar to deliver ground.
My source power for the input side of the fuse. A buss bar that neatly splits the incoming constant +12VDC 20A circuit from the OEM auxiliary lights connector.
This connector will hold three micro fuses, this buss bar, or a combination thereof.
Closed up with the water-resistant cover on.
Backside of the fuse box.
Front of fuse box. These little boxes will hold four micro fuses with a lower-profile clear plastic cover or one micro relay and two fuses (as pictured) with the taller cover. Note this is actually the fuse box for my auxiliar lights and power USB power outlet.
Cover in place. The cover has a slot for a sheetmetal mount you can screw or strap to the frame if you so choose.
Next and not pictured I added the yellow +12VDC switched power cable in to my existing switched ignition power feed (which takes its input power from the constanct +12VDC buss bar whcih goes to a relay then the same OEM auxliliar lights connection's ignition power circuit acts as the trigger wire of the relay so creates a circuit that has 20 amps of headroom for me to use.
I have another buss bar for ground distribution, as well, so added the black cable to this.
Once complete working on wiring the two fuse boxes, two buss bars, and my Micro Start jump start lead all tuck into the void previously filled by the factory OEM tool kit, I use its rubber band strap to hold the wiring in place as I button the side cowling back up.
Now on to mounting the camears themselves. The cameras come with some rather weak L mounts. Originally I was going to fabricate my own mounts but I got lazy (not to mention impatient to complete the project). So far they seem to have held up rather well so I may just keep them in place.
I tucked the front camera in uner the headlmap using one of the bolts from my auxiliar light bracket.
Being discrete was one of my goals for this project.
The rear camera is hung off of the Givi top box rack.
I didn't want to drill any holes in the body so you can just see a tiny bit of the cable from the rear camera until it snakes under the rear seat base / luggage rack.
Since I wanted this installation to be discreet I chose to mount the GPS antenna to the dashboard / headlamp superstructure in between the forks. Again I used 3M VHB tape to adhere it.
This is the control unit for the camera. It is natively water resistent so I don't expect any issues.
One more note on the installation - Those various terminals, fuse boxes, and buss bars all came from Cycle Terminal, a good resource for OEM-style connectors. It's typically tough to find these types of connectors and pins in a small quantities.
Now for the fun part. Using it. The camera records to a MicroSD card. I currently have a 64 GB card in frok my GoPro stash but plan to put a 256 GB card in (their published maximum capacity). Offloading video content can be done in one of two ways. You can use their rather slow built in WiFi transfer using their app or remove the MicroSD card and attach it directly to your computer (my preferred method).
There are a lot of different configuration options to go through, I chose to not display speed (wink wink), show my license plate number on the outputted video, and the date of time. They also have a rather poorly named function called "loop time" with various durations. This isn't actually a loop, rather this is breaking up the videos into smaller sections, I chose three minutes to make for easier offloading through the app. One downside here is it appears the divided up videos overlap by about half a second so when stitching videos together you'll need to pay attention.
If you just want to pull straight video you're pretty much done. If you want to get a bit more exotic I recommend the app Dashcam Viewer available for either PC or Mac for $25. This will give you telemetry based on the GPS location. Note if you have previously tried this and found the GPS data not to work with these cameras I contacted the developer and he wrote an update to read these files. Here is a sample video of what you see in the software:
Now for some samples of day verses night videos. Both of these vides are the same section of road:
Day:
Night:
As you will notice the video quality isn't as high as cameras such as GoPros but that's okay, this isn't meant to replace those. The audio quality is particularly terrible but I don't really care about that. You'll see how it cuts in and out, I believe that it is peaking out. It would be nice if the system had some gain controls to help modulate that but I'm not terrible concerned. I really bought this in case of wreck or other interesting things seen while riding.
Sequoia

