Checkswrecks
Ungenear to broked stuff. LiB battery consulting
Staff member
Global Moderator
2011 Site Supporter
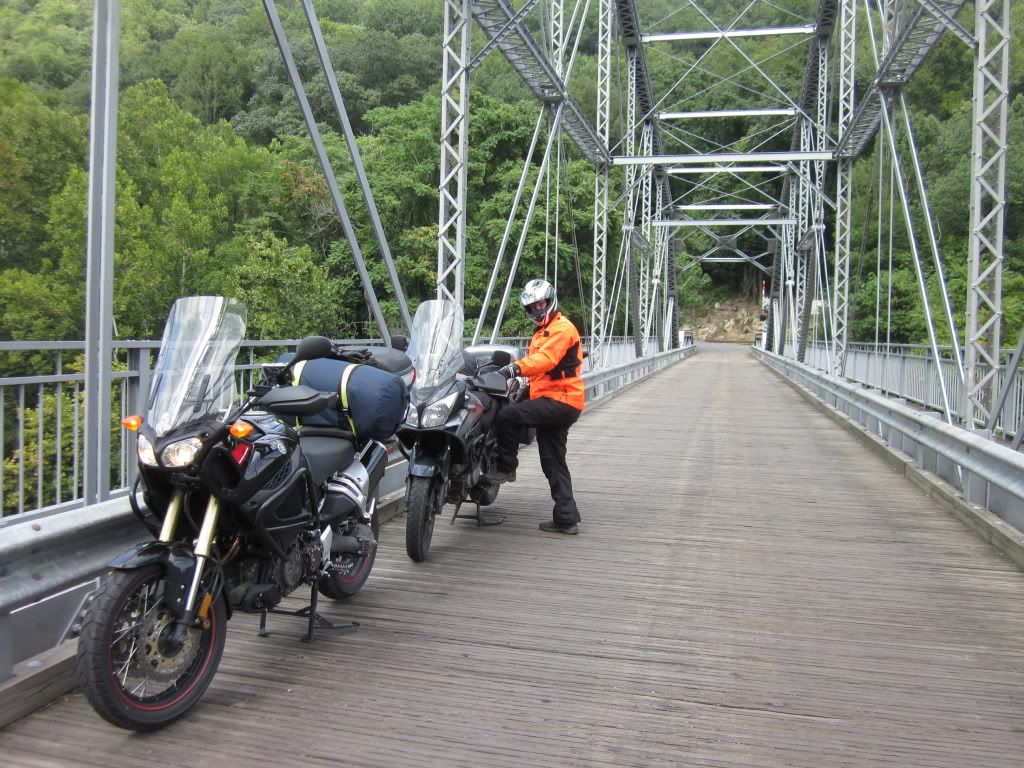
I've posted some photos and got some questions about my windshield, so here's how you can make one for yourself.
Start with a pizza box and some wide tape. Cut the box to a little wider than the stock windscreen. Use the tape to put the top edge of the cardboard at about the height of your upper lip, put the tape in your pocket, and go ride. Move the cardboard up or down to get the right height. You want to look over the windscreen when slouching a little, not through it or sun glare and dirt will block your view.
I do not recommend using flat clear plastic to make windscreens. Been there and done it, so yes it can be done. But 1/8" is too thin, 1/4" is too thick, and it's tough to get a nice symmetric curvature if you can find 3/16". One thing that a cheap piece of plastic is good for is to practice your cutting and edge polishing techniques, before tackling a real windshield. You can get a small piece of 1/8" thickness at the windows department in Home Depot for practice.
Instead, find a cheap bigger windscreen made for something else. Both of these started as surplus extra tall Suzuki Burgman 400 parts that I came across as surplus, but almost anything tall enough will work. There are plenty of used windshields on eBay that can be polished out.

The left-right curvature for the Burgman is a little too flat to be ideal, which is not a problem for the rubber mounts (well nuts) to compensate for.
The most important step is to cover the complete surface of the new plastic with wide tape and to draw on a vertical centerline.
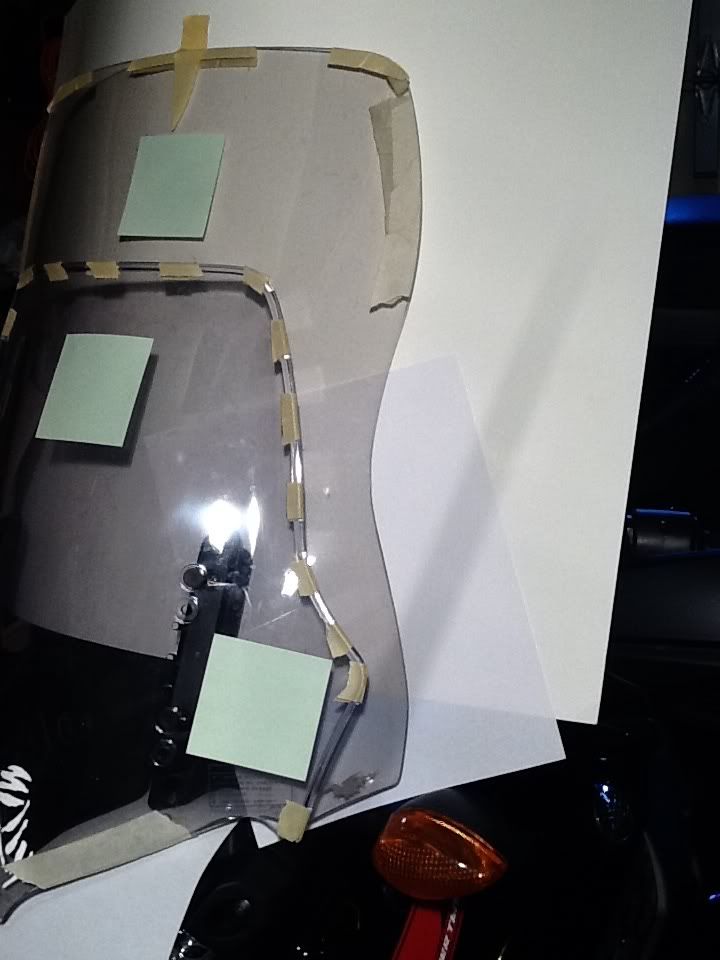
Lay construction paper over your stock windshield and establish a centerline vertically. Then trace both the edges and holes onto the paper. Don't worry about the 3 little square holes, you want the four that you will put the screws through.
Cut out the paper tracing, align the centerline with the one on your taped piece of new plastic, then trace the shape onto the taped surface of the new plastic. Here is my new windshield with the stock windshield laid on top. The new one is about 7" taller and quite a bit wider. I used small pieces of tape to highlight the edges for you and stuck on some 3" square post-it notes for scale.

There are three important points to remember. First is to ONLY run the shoe/foot of the saw on tape, not plastic. Tape is cheap and it is tough to polish deep scratches out.
There are a number of tools that you can use to cut with, I simply use a hand-held jig saw with a medium blade. A fine tooth metal blade can melt the plastic, rather than cut, and micro cracks will start at the edges of the melted areas. Coarse blades can grab so much plastic that big splits will radiate out. Either can work though with good feed rate.
The second most important thing is to go slow and let the blade do the cutting. Do NOT push it.
Same with drilling holes. Use a sharp and relatively flat drill bit, then don't melt the plastic or go so fast the bit grabs the material. Again, you can practice on scrap or a piece from any hardware store. BTW - I drilled three sets of holes so that I can move the new windshield up and down.
Third important thing is to tightly grip the plastic BEHIND the blade so it doesn't vibrate up and down. If you don't do this, the plastic will frequently break or crack where you don't want it to.
I wanted the top edge a bit flatter than my son did, so I also cut the top edge and he has the stock shape on his Wee:

So you have the rough shape cut, now use a file or sanding drum to straighten and smooth the edges. Make sure to run WITH the edge and not across the edge. It looks better and you won't be installing grooves where cracks can develop in the future. I like the clean edge that a sharp file can leave but most people just go with a sanding drum in a drill motor or a hand-held belt sander. If using sandpaper, finish the edge with the finest grade that you can find. Finally, drill your mounting holes.
Mount it up and swing the handlebars all the way from side to side. OOPS, this is where you'll find that you may need to trim the sides a bit for the mirrors to clear. Cut, file, and sand it again.
Start with a pizza box and some wide tape. Cut the box to a little wider than the stock windscreen. Use the tape to put the top edge of the cardboard at about the height of your upper lip, put the tape in your pocket, and go ride. Move the cardboard up or down to get the right height. You want to look over the windscreen when slouching a little, not through it or sun glare and dirt will block your view.
I do not recommend using flat clear plastic to make windscreens. Been there and done it, so yes it can be done. But 1/8" is too thin, 1/4" is too thick, and it's tough to get a nice symmetric curvature if you can find 3/16". One thing that a cheap piece of plastic is good for is to practice your cutting and edge polishing techniques, before tackling a real windshield. You can get a small piece of 1/8" thickness at the windows department in Home Depot for practice.
Instead, find a cheap bigger windscreen made for something else. Both of these started as surplus extra tall Suzuki Burgman 400 parts that I came across as surplus, but almost anything tall enough will work. There are plenty of used windshields on eBay that can be polished out.
The left-right curvature for the Burgman is a little too flat to be ideal, which is not a problem for the rubber mounts (well nuts) to compensate for.
The most important step is to cover the complete surface of the new plastic with wide tape and to draw on a vertical centerline.
Lay construction paper over your stock windshield and establish a centerline vertically. Then trace both the edges and holes onto the paper. Don't worry about the 3 little square holes, you want the four that you will put the screws through.
Cut out the paper tracing, align the centerline with the one on your taped piece of new plastic, then trace the shape onto the taped surface of the new plastic. Here is my new windshield with the stock windshield laid on top. The new one is about 7" taller and quite a bit wider. I used small pieces of tape to highlight the edges for you and stuck on some 3" square post-it notes for scale.
There are three important points to remember. First is to ONLY run the shoe/foot of the saw on tape, not plastic. Tape is cheap and it is tough to polish deep scratches out.
There are a number of tools that you can use to cut with, I simply use a hand-held jig saw with a medium blade. A fine tooth metal blade can melt the plastic, rather than cut, and micro cracks will start at the edges of the melted areas. Coarse blades can grab so much plastic that big splits will radiate out. Either can work though with good feed rate.
The second most important thing is to go slow and let the blade do the cutting. Do NOT push it.
Same with drilling holes. Use a sharp and relatively flat drill bit, then don't melt the plastic or go so fast the bit grabs the material. Again, you can practice on scrap or a piece from any hardware store. BTW - I drilled three sets of holes so that I can move the new windshield up and down.
Third important thing is to tightly grip the plastic BEHIND the blade so it doesn't vibrate up and down. If you don't do this, the plastic will frequently break or crack where you don't want it to.
I wanted the top edge a bit flatter than my son did, so I also cut the top edge and he has the stock shape on his Wee:
So you have the rough shape cut, now use a file or sanding drum to straighten and smooth the edges. Make sure to run WITH the edge and not across the edge. It looks better and you won't be installing grooves where cracks can develop in the future. I like the clean edge that a sharp file can leave but most people just go with a sanding drum in a drill motor or a hand-held belt sander. If using sandpaper, finish the edge with the finest grade that you can find. Finally, drill your mounting holes.
Mount it up and swing the handlebars all the way from side to side. OOPS, this is where you'll find that you may need to trim the sides a bit for the mirrors to clear. Cut, file, and sand it again.