SpeedStar
XT12 and DL650
Founding Member
2011 Site Supporter
2012 Site Supporter
2013 Site Supporter
Vendor
I have two items to cover here.
1) Airscrew adjustment to fix the off-idle stumble that some have complained about, especially in the California model.
2) Throttle Body Sync that will apply to all models. The TBS has to be done after the airscrew adjustment as part of the process.
I also installed pigtails to the ports to stay installed to make checking the sync later a simple process that will not involve lifting the tank. If you have to make adjustments, you will have to lift the tank to access the screw on the left, but the check is easy without lifting to see if a change is needed.
According to the Yamaha technician that I spoke to, the off-idle stumble and low RPM rough running issues are caused by the adjustment that Yamaha has to make to pass emissions. He said the airscrews are adjusted all the way in from the factory. The service manual says not to adjust the standard airscrew (the one on the right side with white paint on it). For this fix, you adjust both.
Here is the fix:
1) Remove side panels, and tilt tank up to gain access the throttle bodies.
2) The right Airscrew on mine was the standard with white paint. The service manual says not to adjust this one. For this fix, you adjust both of them three quarters of a turn out, (counter-clockwise rotation 270 degrees).
Once they are both rotated 270 degrees out, then you adjust the unpainted one in or out to do the throttle body sync. This puts the Airscrews in the needed position for smooth low RPM running.
I marked my screws with a sharpie ahead of time to be sure of the original location and to see what adjustment I ultimately made to the screws.
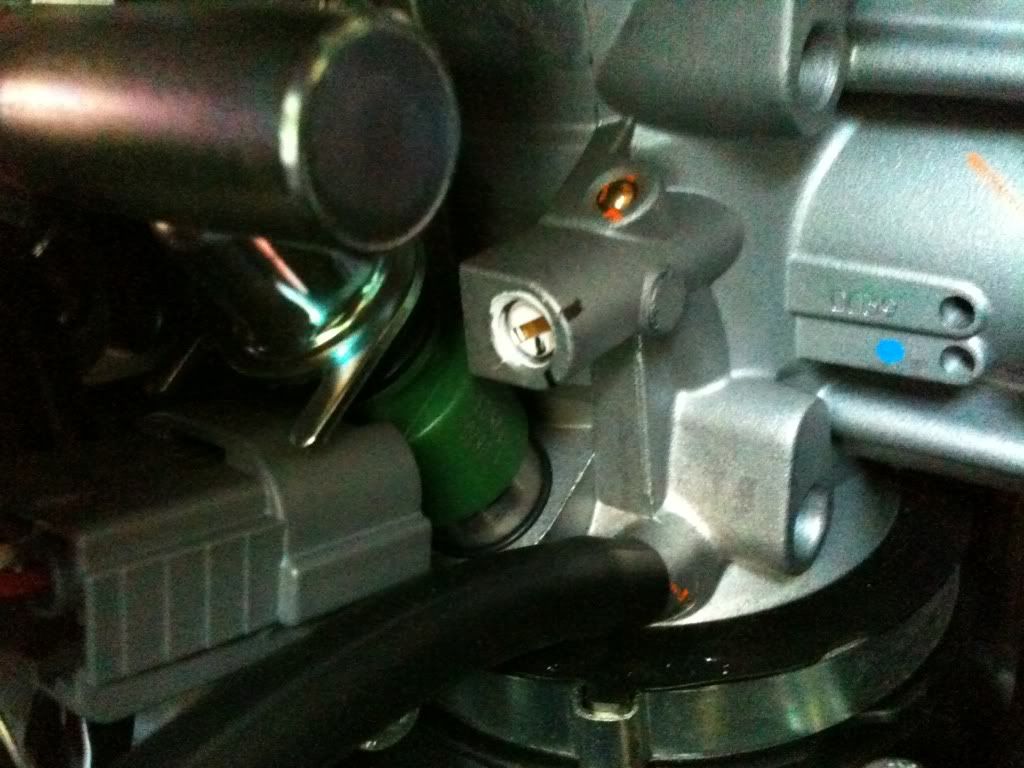
Here is the right side standard before adjustment.
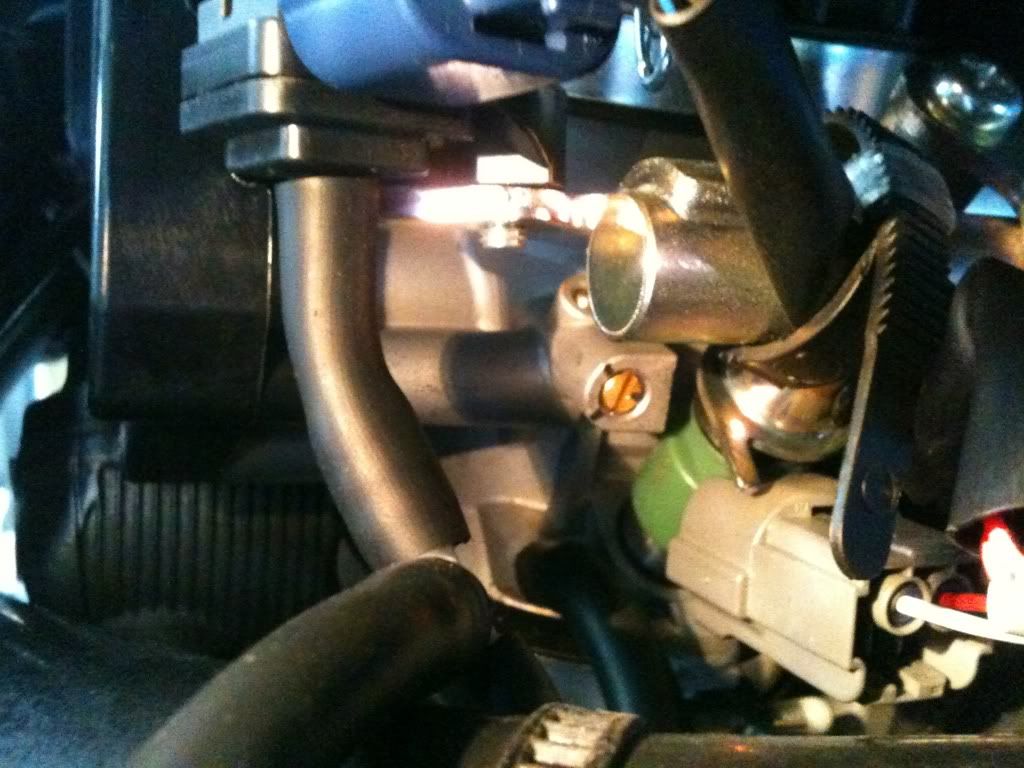
Here is the left side before adjustment.

Here is my left side airscrew after the throttle body sync. I ended up having to adjust it back in about an eighth of a turn to get in sync after the adjustment.
The actual Throttle Body Sync is very straight-forward and is outlined in the service manual in section 3-8.
I did install pigtails on my ports to stay connected as I mentioned earlier.
You can see them in my pictures above.
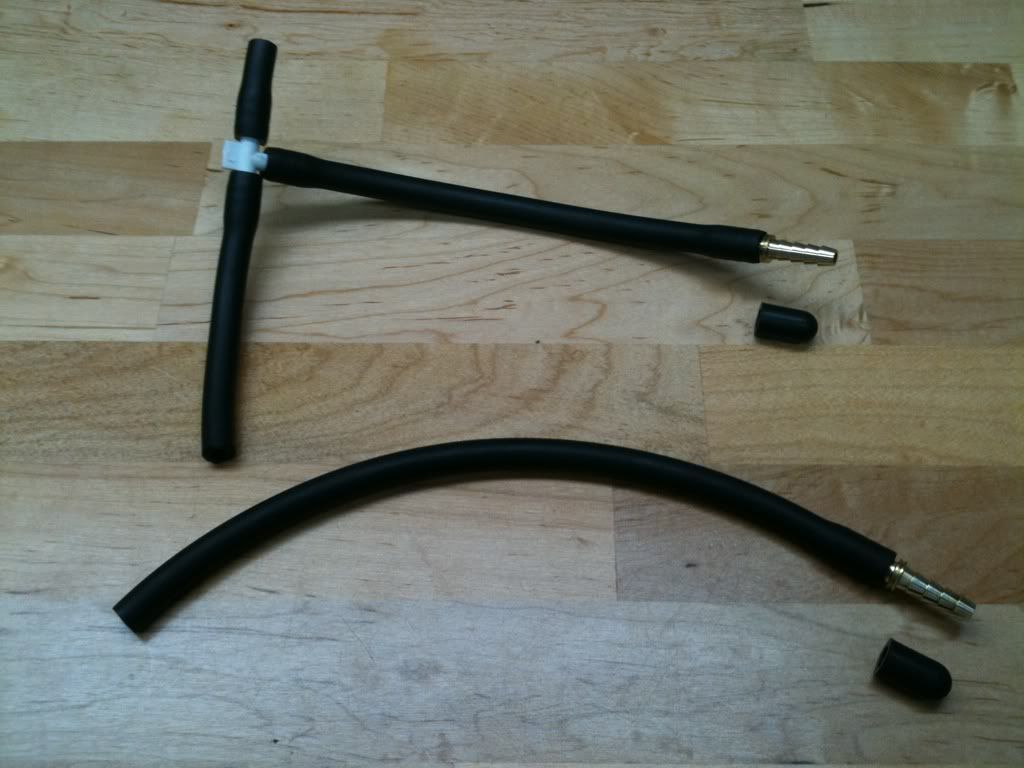
Here they are before I put them in place.
The materials you need for this are:
1) about two feet of 5/32 vacuum hose
2) Two .1875" brass barb connectors
3) two 5/32 vacuum caps
4) One .1875" Vacuum "T" connector
5) three small spring hose clamps to ensure no vacuum leaks.
For the left port you cut three sections of tubing to 1.5", 3.25" and 6".
For the right port, cut one section of tubing to 8".
Assemble them as shown in the picture. Install on the ports and route as shown in the pictures.
When you do a TBS, pull the vacuum cap off of the hose barb and connect your manometer. After the sync, cap the barb and leave in place for the next time you need to check sync.
I suggest you use the small spring hose clamps at the two ports and the plastic nipple on the left side. I tried it without these first and got an engine light fault on decel from a vacuum leak.
A smaller diameter .125" ID hose would be better, like the small one that is removed from the left side, but I could not find that at my auto parts store.
You can also remove the pigtails and replace the original tubing and cap and access this once the tank is down. You can add the pigtails back without having to lift the tank.
This was an easy fix to the off-idle stumble and made a huge difference.
The bike actually idles along on its own now and will run in first gear at about 8mph with no throttle input.
I hope this helps.
1) Airscrew adjustment to fix the off-idle stumble that some have complained about, especially in the California model.
2) Throttle Body Sync that will apply to all models. The TBS has to be done after the airscrew adjustment as part of the process.
I also installed pigtails to the ports to stay installed to make checking the sync later a simple process that will not involve lifting the tank. If you have to make adjustments, you will have to lift the tank to access the screw on the left, but the check is easy without lifting to see if a change is needed.
According to the Yamaha technician that I spoke to, the off-idle stumble and low RPM rough running issues are caused by the adjustment that Yamaha has to make to pass emissions. He said the airscrews are adjusted all the way in from the factory. The service manual says not to adjust the standard airscrew (the one on the right side with white paint on it). For this fix, you adjust both.
Here is the fix:
1) Remove side panels, and tilt tank up to gain access the throttle bodies.
2) The right Airscrew on mine was the standard with white paint. The service manual says not to adjust this one. For this fix, you adjust both of them three quarters of a turn out, (counter-clockwise rotation 270 degrees).
Once they are both rotated 270 degrees out, then you adjust the unpainted one in or out to do the throttle body sync. This puts the Airscrews in the needed position for smooth low RPM running.
I marked my screws with a sharpie ahead of time to be sure of the original location and to see what adjustment I ultimately made to the screws.
Here is the right side standard before adjustment.
Here is the left side before adjustment.
Here is my left side airscrew after the throttle body sync. I ended up having to adjust it back in about an eighth of a turn to get in sync after the adjustment.
The actual Throttle Body Sync is very straight-forward and is outlined in the service manual in section 3-8.
I did install pigtails on my ports to stay connected as I mentioned earlier.
You can see them in my pictures above.
Here they are before I put them in place.
The materials you need for this are:
1) about two feet of 5/32 vacuum hose
2) Two .1875" brass barb connectors
3) two 5/32 vacuum caps
4) One .1875" Vacuum "T" connector
5) three small spring hose clamps to ensure no vacuum leaks.
For the left port you cut three sections of tubing to 1.5", 3.25" and 6".
For the right port, cut one section of tubing to 8".
Assemble them as shown in the picture. Install on the ports and route as shown in the pictures.
When you do a TBS, pull the vacuum cap off of the hose barb and connect your manometer. After the sync, cap the barb and leave in place for the next time you need to check sync.
I suggest you use the small spring hose clamps at the two ports and the plastic nipple on the left side. I tried it without these first and got an engine light fault on decel from a vacuum leak.
A smaller diameter .125" ID hose would be better, like the small one that is removed from the left side, but I could not find that at my auto parts store.
You can also remove the pigtails and replace the original tubing and cap and access this once the tank is down. You can add the pigtails back without having to lift the tank.
This was an easy fix to the off-idle stumble and made a huge difference.
The bike actually idles along on its own now and will run in first gear at about 8mph with no throttle input.
I hope this helps.
")