EricV
Riding, farkling, riding...
2011 Site Supporter
2012 Site Supporter
2013 Site Supporter
2014 Site Supporter
I wanted a fuel cell for my Super Tenere due to getting a draw in the '13 Iron Butt Rally. I also find it very handy when riding in shorter endurance rallies and traveling in Alaska, Eastern OR/WA, etc where fuel is not always available at night. (OR doesn't have 24 hour pumps, for example, and a lot of the small stations in the high desert East of the Cascades have folded in the tough economy.) My friend Ernie A. offered to make one up for me and I finally got a chance to go up to Portland, OR and work with him on the project that culminated in the design and item you see below.
I've had fuel cells on my previous FJR, both a Jazz 4.25 Gal generic cell and a custom Tanji Flat Bed fuel cell that was 4.8 Gal. Fuel cell use is not new to me.
My general needs were:
- double my range to reserve (real world, I'm getting 360-400 miles before reserve now, depending on conditions and speeds. Most of the trip home was at 70-80 mph speeds).
- have a load platform that I could strap things to
- An accessory rail to mount a flashlight to the side
- my roll of duct tape over the filler neck
- A filler neck location that would allow me to fill the tank while seated on the bike, (arguments exist for and against this procedure, but it's my preference)
- have a design that would pass IBR technical inspection.
All of those needs were met with this design.
Ernie also has another design that is mounted in the pillion seat location and leaves the rear open for luggage. Intended to work with AltRider rear racks and the oem one. That design is perfect for those riders that have occasion to carry a passenger and want to easily remove the fuel cell when not needed. It's a tad over 5 gal capacity.
Ernie can customize fuel cells to your needs. Nothing in this for me, I'm just really, really happy with my fuel cell and wanted to share this with the ST guys.
www.eazcycle.com for contact info, but the web site is still under construction.
Pics:
In fabrication progress
pics died.
Painting, (chose to paint instead of anodize or powder coat due to time constraints, but both of those options are available.)
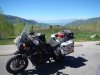
Finished cell on bike. 4.8 Gal. Works great, gives me a 400 mile range on the bike, conditions and speeds being variable.
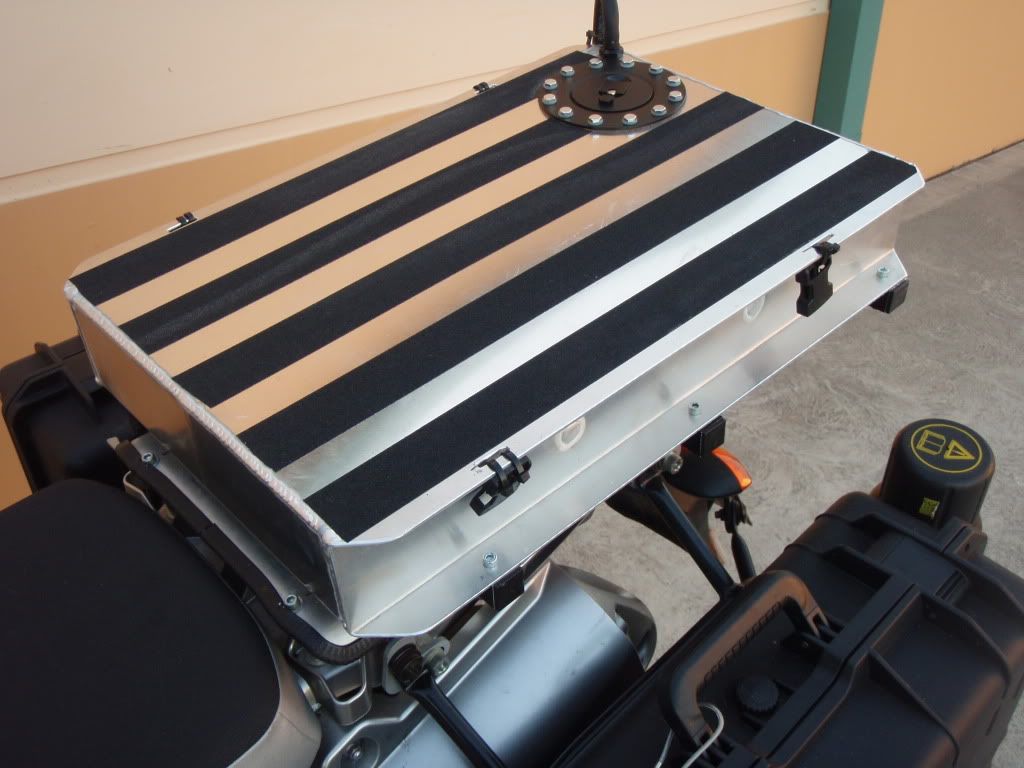
Dimensions: The fuel cell is essentially a 13" x 23" x 4.5" box. The load platform overhangs the sides and back by 1" with 5/16" slots for straps or bungie cords. The front fence sticks up 1" so loads will not slide forward. This fence could be taller and incorporate a back rest or pad if so desired. While the basic design is established, custom touches are up to the customer to come up with and personalize with the fabricator. This cell is made from .125" wall aluminum throughout.
Fitting at rear right corner is a tip over valve as well as vent. A check ball prevents fuel loss if the bike is on it's side or worse. The flash light holder is something I wanted, but this could be adapted for any accessory you have that fits in that area. Or simply drilled and tapped for some general purpose use, or deleted from the design. I wanted a very direct fuel line run, so did some minor modifications to the aluminum seat bracket and plastic trays to allow the fuel line to run as shown. The filter sits out behind the seat for excellent visual inspection and the marine drybreak fittings under the seat allow for quick removal of the fuel cell, if desired. The seat can still be used in the high or low positions. I used marine 5/16" fuel line which has a tough outer layer and normal rubber inner layer. Just a little extra durability and resistance to abrasion, etc. All fittings are 5/16" I.D. and the cap is a non-vented, DOT approved, tethered, ratcheting design, also sourced from Coyote-
Gear.
One of the really cool things about this fuel cell design is the minimum number of pieces involved. The front panel is one piece all the way down to the mounting tabs. The main bottom also has the sides as one piece, folded up and re-enforced with an internal weld. The back is just a single piece welded in. The top load platform is one piece with all the slots milled in. So the main tank is essentially four pieces. The neck is part purchase part that comes with the cap, the other is a 2" tube. They are not just butt welded together, but machined to press fit together, then welded. Tons of details involved in this tank. And it shows in the final results and how it performs.
Note that the fuel cell is bolted to the bike at four points, two up front and two in the rear that go thru tubes to spacers welded to the tank at the bottom. This is mounted with the factory rack in place, with four additional rubber pads in the rack holes for some buffer, but solid to the bike. Very solid. I was doing IBR tech last year and this easily passes inspection for the IBR. The volume of this tank, w/o air gap, is 5.0 gallons. This means that with the published capacity of the Super Ten at 6.1 gallons, plus 5 gallons of the fuel cell, (which you can't actually get into it), I am well under the 11.5 gallon maximum allowable capacity. This makes for a low stress tech inspection at the IBR for me. ::008::
I used a brass bulkhead fitting that took at 5/8" hole and has a 5/16" outlet to a hose barb. Sourced that at Oil Filter Service Company in Portland, OR, along with some o-ring washers. Was easy to install down low on the left side of the tank. This did require removal of the fuel pump assy, which requires separating the two halves of the assembly, which is not for the faint of heart. I taped a small cap from a spray bottle over the inside of the hole with some duct tape to catch most of the chips, then vacuumed out the few chips from the tank that escaped that. Deburr the hole well, and it helps to have a stubby ratchet and big sockets. Otherwise very strait forward.
Basic directions here for installing a bulkhead fitting - http://www.fjr1300.info/howto/bulkhead.html
I chose a Rustoleum mettalic paint to look fairly close to the finish on the Zega Pro side cases. Anodizing or powder coating in almost unlimited colors is possible if you have the time and $$. The paint was fast and easy and protects the aluminum from oxidizing. Dries to touch in 5 minutes, cures in 30 minutes. Made applying the 3 coats painless and fast. I installed plugs and masked them off as well as the fuel filler neck, (from Coyote-Gear, though they no longer show this item on their site), prior to painting. After paint, I installed the fittings with some Loctite 367 PST.
There is a small sump welded onto the tank that angles fuel down and gives a better mounting place for the valve than just a strait bung in the tank. This places it in easy reach on the side of the fuel cell. Since this is a gravity fuel cell design, (hey, it's a LAW), this keeps the gas always flowing down hill, which is a very good thing.
In practice, I fill both tanks at the gas station. I ride until the gas gauge shows 3/4 tank, (80-120 miles), then switch the fuel cell valve open. At this point it takes about 6 minutes for the gauge to return to the full indication, and it stays at full to 225-250 miles, then drops to 3/4 again. I suspect that shortly after it goes to 1/2 indication, the fuel cell is empty. When I stop for gas, I close the fuel cell valve, fill both tanks and repeat.
I plan to mount a hydration jug on the fuel cell for rally use. Currently I have one mounted at the foot peg, but would prefer it to be higher and not in the way when I paddle the bike around in parking lot or off pavement conditions.
Got questions? Ask em and I'll do the best I can to answer them, or ping Ernie.
I've had fuel cells on my previous FJR, both a Jazz 4.25 Gal generic cell and a custom Tanji Flat Bed fuel cell that was 4.8 Gal. Fuel cell use is not new to me.
My general needs were:
- double my range to reserve (real world, I'm getting 360-400 miles before reserve now, depending on conditions and speeds. Most of the trip home was at 70-80 mph speeds).
- have a load platform that I could strap things to
- An accessory rail to mount a flashlight to the side
- my roll of duct tape over the filler neck
- A filler neck location that would allow me to fill the tank while seated on the bike, (arguments exist for and against this procedure, but it's my preference)
- have a design that would pass IBR technical inspection.
All of those needs were met with this design.
Ernie also has another design that is mounted in the pillion seat location and leaves the rear open for luggage. Intended to work with AltRider rear racks and the oem one. That design is perfect for those riders that have occasion to carry a passenger and want to easily remove the fuel cell when not needed. It's a tad over 5 gal capacity.
Ernie can customize fuel cells to your needs. Nothing in this for me, I'm just really, really happy with my fuel cell and wanted to share this with the ST guys.
www.eazcycle.com for contact info, but the web site is still under construction.
Pics:
In fabrication progress
pics died.
Painting, (chose to paint instead of anodize or powder coat due to time constraints, but both of those options are available.)
Finished cell on bike. 4.8 Gal. Works great, gives me a 400 mile range on the bike, conditions and speeds being variable.
Dimensions: The fuel cell is essentially a 13" x 23" x 4.5" box. The load platform overhangs the sides and back by 1" with 5/16" slots for straps or bungie cords. The front fence sticks up 1" so loads will not slide forward. This fence could be taller and incorporate a back rest or pad if so desired. While the basic design is established, custom touches are up to the customer to come up with and personalize with the fabricator. This cell is made from .125" wall aluminum throughout.
Fitting at rear right corner is a tip over valve as well as vent. A check ball prevents fuel loss if the bike is on it's side or worse. The flash light holder is something I wanted, but this could be adapted for any accessory you have that fits in that area. Or simply drilled and tapped for some general purpose use, or deleted from the design. I wanted a very direct fuel line run, so did some minor modifications to the aluminum seat bracket and plastic trays to allow the fuel line to run as shown. The filter sits out behind the seat for excellent visual inspection and the marine drybreak fittings under the seat allow for quick removal of the fuel cell, if desired. The seat can still be used in the high or low positions. I used marine 5/16" fuel line which has a tough outer layer and normal rubber inner layer. Just a little extra durability and resistance to abrasion, etc. All fittings are 5/16" I.D. and the cap is a non-vented, DOT approved, tethered, ratcheting design, also sourced from Coyote-
Gear.
One of the really cool things about this fuel cell design is the minimum number of pieces involved. The front panel is one piece all the way down to the mounting tabs. The main bottom also has the sides as one piece, folded up and re-enforced with an internal weld. The back is just a single piece welded in. The top load platform is one piece with all the slots milled in. So the main tank is essentially four pieces. The neck is part purchase part that comes with the cap, the other is a 2" tube. They are not just butt welded together, but machined to press fit together, then welded. Tons of details involved in this tank. And it shows in the final results and how it performs.
Note that the fuel cell is bolted to the bike at four points, two up front and two in the rear that go thru tubes to spacers welded to the tank at the bottom. This is mounted with the factory rack in place, with four additional rubber pads in the rack holes for some buffer, but solid to the bike. Very solid. I was doing IBR tech last year and this easily passes inspection for the IBR. The volume of this tank, w/o air gap, is 5.0 gallons. This means that with the published capacity of the Super Ten at 6.1 gallons, plus 5 gallons of the fuel cell, (which you can't actually get into it), I am well under the 11.5 gallon maximum allowable capacity. This makes for a low stress tech inspection at the IBR for me. ::008::
I used a brass bulkhead fitting that took at 5/8" hole and has a 5/16" outlet to a hose barb. Sourced that at Oil Filter Service Company in Portland, OR, along with some o-ring washers. Was easy to install down low on the left side of the tank. This did require removal of the fuel pump assy, which requires separating the two halves of the assembly, which is not for the faint of heart. I taped a small cap from a spray bottle over the inside of the hole with some duct tape to catch most of the chips, then vacuumed out the few chips from the tank that escaped that. Deburr the hole well, and it helps to have a stubby ratchet and big sockets. Otherwise very strait forward.
Basic directions here for installing a bulkhead fitting - http://www.fjr1300.info/howto/bulkhead.html
I chose a Rustoleum mettalic paint to look fairly close to the finish on the Zega Pro side cases. Anodizing or powder coating in almost unlimited colors is possible if you have the time and $$. The paint was fast and easy and protects the aluminum from oxidizing. Dries to touch in 5 minutes, cures in 30 minutes. Made applying the 3 coats painless and fast. I installed plugs and masked them off as well as the fuel filler neck, (from Coyote-Gear, though they no longer show this item on their site), prior to painting. After paint, I installed the fittings with some Loctite 367 PST.
There is a small sump welded onto the tank that angles fuel down and gives a better mounting place for the valve than just a strait bung in the tank. This places it in easy reach on the side of the fuel cell. Since this is a gravity fuel cell design, (hey, it's a LAW), this keeps the gas always flowing down hill, which is a very good thing.
In practice, I fill both tanks at the gas station. I ride until the gas gauge shows 3/4 tank, (80-120 miles), then switch the fuel cell valve open. At this point it takes about 6 minutes for the gauge to return to the full indication, and it stays at full to 225-250 miles, then drops to 3/4 again. I suspect that shortly after it goes to 1/2 indication, the fuel cell is empty. When I stop for gas, I close the fuel cell valve, fill both tanks and repeat.
I plan to mount a hydration jug on the fuel cell for rally use. Currently I have one mounted at the foot peg, but would prefer it to be higher and not in the way when I paddle the bike around in parking lot or off pavement conditions.
Got questions? Ask em and I'll do the best I can to answer them, or ping Ernie.
Last edited:
") )
)