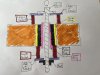
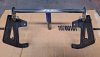
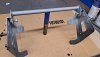
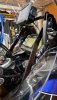
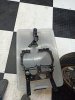
Has anyone had success replacing the rubber handlebar bushings on a Gen 2? I tried hammering them out with a punch - the inner ring moved a few mm down (permanently) relative the outer ring, but the outer ring wouldn't budge. Perhaps I need to eat more Wheaties. After about a half hour of trying off and on I decided to leave them in place and see if a shop could try next time I take it in for a valve check. No mention of the mounts in the service manual either - maybe Yamaha didn't ever intend for them to be replaced, although if that is the case then I wonder why they are selling them as spare parts?
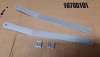
Strangely, after re-attaching the handlebar, it wiggles less now than they did before, which is why I wanted to replace he bushings with fresh rubber in the first place I'm not too worried that I damaged the existing rubber seeing as how hard I had to hammer on them to get the center to move even a tiny bit.