Dshane
Active Member
Looking with MacBook Air and I can't see first posting pictures. All others are there.


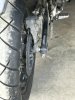
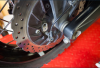
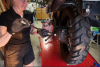
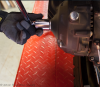
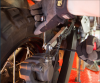
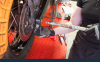
For some unknown reason I and many others are unable to see the pictures on the first page anymore so hopefully this will help someone someday. I have always referred to these tire changing threads anytime I was changing tires they are very helpful and I’m sure have prevented many mistakes.i can see the pictures on page 1, and the first picture shows that washer and spacer
rob
The page(s) no longer exist at twisties.smugmug.com, so I'm not sure how anybody would be able to see the photos that were hosted there.For some unknown reason I and many others are unable to see the pictures on the first page anymore so hopefully this will help someone someday. I have always referred to these tire changing threads anytime I was changing tires they are very helpful and I’m sure have prevented many mistakes.
how did you manage that fella
I just used the MS snipping tool on each picture and copied and pasted each one straight in to a new post, there must be a numerical limit as the extra post was pictures it wouldn't let me paste in. Looking back what I should have done was grabbed the text at the same time as part of each picture. I thought I had better do it now whilst I can actually see them, I couldn't view them a few months ago when I was putting new tyres on and they are a great resource.how did you manage that fella
rob