Re: Bigger passenger pegs
Well I discovered my Moose Racing Offset Hybrid Footpegs from my 2011 KLR 650 would work on the 2012 S10 just needed a washer as a spacer. Hey Moose Racing guys your product will fit another bike at the mere cost of two washers.
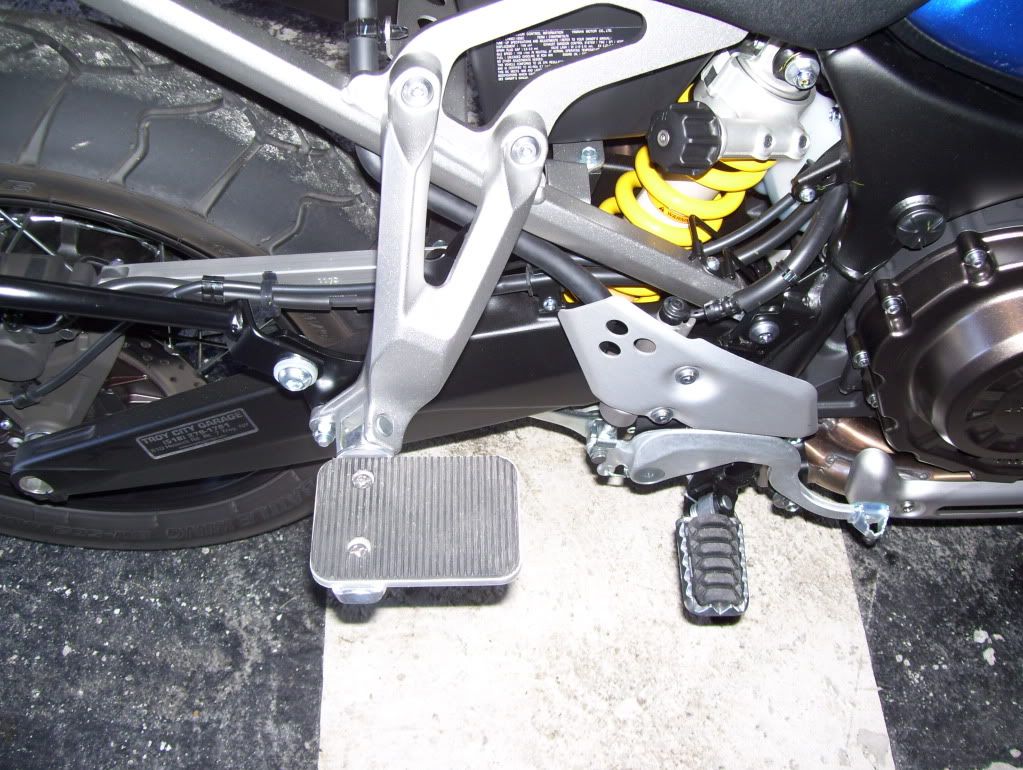
Here is what I did with the stock rider pegs. First pic is the moose pegs, the rest are the stock rider pegs mounted for the passenger. Yes the wifey wanted a bigger target when mounting the bike.

No special skills just and grinder and a drill got the job done. Pull the stock passenger pegs by removing the cotter pin from peg pin. Remove peg pin from the peg mount and peg. Be careful when pulling peg free as there is a detent plate, a detent ball, and the detent spring. The spring and ball are held in place by the hole in the peg and the detent plate is held in place by the peg pin. The rider peg is a wider in the pin hole area, so you have to grind it to fit in the passenger mount. I leveled the top side of the peg first removing the small hump around the hole. Then grind away what was need off the bottom of the peg to get a good fit. You have to grind enough off the width so the peg with fit in the mount along with the detent plate. Test fit by mounting the peg and detent plate in the mount with the peg pin, it should move freely, no binding.
Now with the peg and detent plate test mounted in the mount with the peg pin, fold peg to the up position to mark the spot for the detent spring hole to be drilled. You want the peg in the up position this is where you want the detent to work, to hold the peg up. Peg in the down position you really do not need the detent to work. Why this is important is because the left side peg is not going to fold all the way straight up like the right side due to the width of the peg itself hitting the mount on the left side. So with the pegs in up position you can use a awl or pick to scratch the bottom outline of the detent plate on too the top face of the peg. The goal is to mark the center of the half moon shape of the detent plate on to the top face of the peg. This is where to drill the detent spring hole.
Remove the peg from mount along with detent plate. Place detent plate in position on top face of peg and align with scratched outline. Use center punch to mark spot in what would be the center of the half moon shape on the top face of the peg. Select a drill bit slightly larger than the spring. Also measure depth of peg which is shorter than the original passenger peg since it got different design because you do not want to drill all the way through. I used a piece a masking tape on the drill bit as a drill stop. Drill the hole, the peg alloy is not really that hard, I did this with a cordless drill. Drill as deep as you can without breaking through the backside of the peg.
Now due to the design of the rider peg vs the passenger peg the spring is going to be too long because you can not drill a deep enough hole in the rider pegs. So cut off a loop or two of the spring and test fit spring in hole with detent ball. The bottom of detent ball should sit about level or just below the top surface of the peg. Use the uncut spring, detent ball and the original passenger peg as reference. Now the most challenging part is to get all the parts mounted in the peg mount. Note to self: Build containment box or curtain around work area unless you like crawling around on your hands and knees searching for detent ball that gets away from you. Peg with spring in hole, detent ball on top, with detent plate pressed on top or them cupped between your two thumbs and index fingers. Do not worry about the peg pin yet, just try to get peg and detent plate squeezed into the peg mount. A phillips screwdriver about the size of the peg pin is useful here to help align peg and the detent plate as its under pressure from the detent spring. Install peg pin and cotter pin to secure pin. If you cut the spring a little short and it does not have enough snap in tension, pull peg apart again. Remove spring and stretch it a little too correct tension.