To remove the front wheel you will need:
19 mm hex
6 mm hex
4 mm hex
12 mm socket
Torque wrenches
Breaker bar
I also use a floor jack and a pair of straps, but other items may work.
Keep magnets away, or you can damage the speed sensor. Never operate the brake when the caliper is removed. Avoid banging the speed sensors, avoid solvents on the speed sensors. Ensure that the bike is properly supported.
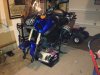
1. Support the bike securely so that the front wheel is off the ground. I do this with the bike on the center stand. I hook a strap on either side near the back of the bike for extra stability. Be sure they are tensioned evenly, and do not pull the bike over onto you. I place a floor jack with a block of wood on it under the front of the skid plate, and lift until the back wheel just contacts the ground, then retension the two security straps. Be sure not to lift the front enough to unweight the center stand.
2. Remove the speed sensor (4 mm hex tool):


3. Remove the brake calipers (12 mm socket):
Start with the left lower bolt as it retains the speed sensor cable. Note how the speed sensor cable runs through the clip.


Then remove the left upper bolt:

Pull the caliper straight away:

and let it hang free:

Now remove the right caliper:


You can take a look at your brake pads and rotors if you like:


4. Loosen the two pinch bolts (6 mm hex tool). Note that for reassembly the inner pinch bolt must be torqued first. EDIT (Thanks to MarkJenn): After torquing the outer pinch bolt, go back and retorque the inner one, e.g. Inner... outer.... inner. /EDIT The image shows the hex tool working on the inner pinch bolt:

5. Remove the axle (19 mm hex tool and breaker bar)


Break it free then spin it until it is unthreaded. Then just pull it free by hand.


6. Remove wheel.
The wheel is now free. Work it out.

This spacer is friction fit on the right side. It may fall out or interfere with tire mounting. I usually just pull it free and set it aside.

Here is the left side of the wheel. The speed sensor housing is just sitting in there loose and will fall out. Remove it.


Note the two flanges I am pointing out on the speed sensor housing. For reassembly these must be properly aligned and engaged with the tab on the left fork. See here:

Like so:

To reinstall, reverse the procedure. Be sure the speed sensor housing is properly aligned. Be sure the speed sensor cable is properly routed. EDIT (Thanks to Yamaguy55): After the brake calipers and axle have been re-installed (axle is threaded but not torqued), and before tightening the axle, hold the front brake and compress the front forks vigorously several times to align the suspension. If, like me, you have the bike on a lift, or otherwise secured, you can complete the job, then when the bike is on the ground loosen the pinch bolts and axle, compress the forks and retorque. /EDIT Be sure to torque the inner pinch bolt first EDIT then the outer, then the inner again /EDIT.
Torque specifications are:
Axle = 72 Nm or 52 ft-lbs
Two Pinch bolts = 21 Nm or 15 ft-lbs (The inside pinch bolt is tightened first)
Front brake caliper to forks = 40 Nm or 29 ft-lbs
Front speed sensor front brake hose holder bolt = 7 NM or 5.1 ft-lbs
19 mm hex
6 mm hex
4 mm hex
12 mm socket
Torque wrenches
Breaker bar
I also use a floor jack and a pair of straps, but other items may work.
Keep magnets away, or you can damage the speed sensor. Never operate the brake when the caliper is removed. Avoid banging the speed sensors, avoid solvents on the speed sensors. Ensure that the bike is properly supported.
1. Support the bike securely so that the front wheel is off the ground. I do this with the bike on the center stand. I hook a strap on either side near the back of the bike for extra stability. Be sure they are tensioned evenly, and do not pull the bike over onto you. I place a floor jack with a block of wood on it under the front of the skid plate, and lift until the back wheel just contacts the ground, then retension the two security straps. Be sure not to lift the front enough to unweight the center stand.
2. Remove the speed sensor (4 mm hex tool):
3. Remove the brake calipers (12 mm socket):
Start with the left lower bolt as it retains the speed sensor cable. Note how the speed sensor cable runs through the clip.
Then remove the left upper bolt:
Pull the caliper straight away:
and let it hang free:
Now remove the right caliper:
You can take a look at your brake pads and rotors if you like:
4. Loosen the two pinch bolts (6 mm hex tool). Note that for reassembly the inner pinch bolt must be torqued first. EDIT (Thanks to MarkJenn): After torquing the outer pinch bolt, go back and retorque the inner one, e.g. Inner... outer.... inner. /EDIT The image shows the hex tool working on the inner pinch bolt:
5. Remove the axle (19 mm hex tool and breaker bar)
Break it free then spin it until it is unthreaded. Then just pull it free by hand.
6. Remove wheel.
The wheel is now free. Work it out.
This spacer is friction fit on the right side. It may fall out or interfere with tire mounting. I usually just pull it free and set it aside.
Here is the left side of the wheel. The speed sensor housing is just sitting in there loose and will fall out. Remove it.
Note the two flanges I am pointing out on the speed sensor housing. For reassembly these must be properly aligned and engaged with the tab on the left fork. See here:
Like so:
To reinstall, reverse the procedure. Be sure the speed sensor housing is properly aligned. Be sure the speed sensor cable is properly routed. EDIT (Thanks to Yamaguy55): After the brake calipers and axle have been re-installed (axle is threaded but not torqued), and before tightening the axle, hold the front brake and compress the front forks vigorously several times to align the suspension. If, like me, you have the bike on a lift, or otherwise secured, you can complete the job, then when the bike is on the ground loosen the pinch bolts and axle, compress the forks and retorque. /EDIT Be sure to torque the inner pinch bolt first EDIT then the outer, then the inner again /EDIT.
Torque specifications are:
Axle = 72 Nm or 52 ft-lbs
Two Pinch bolts = 21 Nm or 15 ft-lbs (The inside pinch bolt is tightened first)
Front brake caliper to forks = 40 Nm or 29 ft-lbs
Front speed sensor front brake hose holder bolt = 7 NM or 5.1 ft-lbs